Tuesday, June 28, 2011

"Oh, Baby!" Back Ribs


These ribs will leave you saying "Oh, baby!" They are that amazing. The meat melts in your mouth and the flavors are exciting. It's like party in your mouth. These baby back ribs are easy to make too- it takes some time, but it's not difficult.

I live in a small apartment so I cook these in my oven. It takes a little planning as you need to put a dry rub on the ribs the night before and it takes 3 hours hours to cook. This recipe is made for 2 racks of ribs, but you can easily make less or more. I usually make 1 rack for every 2 people... or more if we want leftovers... which we always do.

Ingredients:
  • 2 whole racks of pork baby back ribs
  • 1/2 cup brown sugar
  • 2 tablespoons salt
  • 1 tablespoon chili powder (or more if you like it spicy)
  • 1/2 tablespoon cumin
  • 1/2 tablespoon onion powder
  • 1/2 tablespoon garlic powder
  • 1 cup white wine
  • 2 tablespoons white vingar
  • 2 tablespoons Worcestershire sauce
  • 2 cloves garlic, chopped
  1. You will need to apply the dry rub to your ribs the night before and let it sit overnight. Mix together brown sugar, salt, chili powder, cumin, onion powder, and garlic powder. Place a slab of ribs on a peices of heavy duty tin foil, shiny side down, and rub both sides of ribs generously with the seasonings. Fold up edges of foil to create a long tent and roll up the short ends. Repeat with other rack of ribs and place in fridge overnight.
  2. Preheat oven to 250.
  3. In small saucepan over medium heat, mix together the wine, Worchestershire sauce, vinegar, and garlic, and bring to simmer. Open up the ribs by unfolding one of the small sides and pour in equal amounts of the liquidto each. Fold back up the side and tilt to disperse evenly.
  4. Place ribs in oven and cook until meat pulls away from the bone and the bone ha good wiggle, about 2.5 hours.
  5. Remove ribs from oven and allow to cool slightly. Drain the braising liquid back into the saucepan by cutting a whole in the bottom of the tinfoil and allowing to drain. Reduce braising liquid into a sauce. The sauce will be ready when it can coat the back of a spoon. 
  6. Open the tin foil up completely and brush the ribs with the sauce.
  7. Place the ribs under the broiler until carmelization occurs.
  8. Brush the ribs again with sauce and serve.
Sunday, June 26, 2011

Cheese 'N Mac...'N Bacon

Macaroni and cheese may be America’s ultimate comfort food. For me, it brings back memories of my mom’s recipe (shells with Velveeta) that I ate as a kid, the semester I spent in college studying in Russia and eating Kraft Dinner to remind me of home, a New Year’s Eve party where I attempted to make fried macaroni and cheese, and a wonderful evening I shared with my mom, husband, and a good friend in a fine restaurant in Santa Barbara where I ate the best baked macaroni and cheese that I’ve ever had.


I love a good macaroni and cheese, but hate a bad macaroni and cheese. I can't stand when the cheese separates or it leaves a puddle of grease at the bottom of my plate. A good macaroni and cheese must be baked with a crispy top, but creamy on the inside.

You may be thinking I titled my blog entry incorrectly. The cheese should be the star and that is why I call it "Cheese 'N Mac." The cheese comes first! Unless there is bacon... Then it get complicated. Here is my recipe with note on what you can change to adjust it to your own tastes.

Ingredients:
  • 1/3 lb raw bacon, chopped in penny size pieces. If you don't want to use bacon, you will need a couple tablespoons of butter instead.
  • 2 shallots, minced
  • 2 cloves garlic, minced
  • 3 tablespoons flour
  • 4 cups milk (cool milk. If you use hot milk which some recipe say to do, you will get a lumpy sauce.)
  • 3 cups shredded cheese- use whatever you like or experiment with different combinations. If I'm using bacon, I love white cheddar and brie. I also like using half white cheddar and pepper jack. Or whatever I have in the fridge and need to use up.
  • Want to add sun dried tomatoes? Fresh herbs? Awesome! I love adding some chili powder for zing and extra smokiness.
  • salt and pepper, to taste
  • 1 lb cooked macaroni
  • 1/4 cup bread crumbs
  1. Preheat oven to 350.
  2. Cook bacon in medium sized pot until crispy. Leaving 2 tablespoons of grease in the pot, remove the excess bacon grease. If you aren't using bacon, just skip this step and cook the shallot and garlic in butter instead (in next step).
  3. Add shallot and garlic, and cook until fragrant.
  4. Add in flour and stir for about 3 minutes, until flour is cooked.
  5. Pour in milk and bring sauce up to a simmer. Sauce will start to thicken.
  6. Stir in cheese and other ingredients if you have them. Remove from heat once the cheese is melted.
  7. Season to taste and stir in macaroni.
  8. Pour into casserole dish and sprinkle with bread crumbs. Cook for 20 minutes. If the bread crumbs don't brown, place under the broiler.

Thursday, June 23, 2011

Bacon and Corn Chowdah

This isn't just any ol' corn chowder (pronounced "chowdah" if you're from Boston, but I'm not); this is corn chowder done my way: with bacon. And it's delicious, if I do say so myself. I grew up in a farming town where there was lots of corn and I love eating fresh corn in the summer. Use fresh corn if you can get it, but frozen corn will be great too. Just don't use canned corn or it will be mushy.

Ingredients:
  • 4 oz bacon, a little goes a long way
  • 1 onion, chopped
  • 2-4 cloves garlic, minced
  • 2 tablespoons flour
  • 1 large (or 2 small) potato, peeled and cut into medium-small cubes
  • 2-3 cups chicken broth
  • 4 cups fresh sweet corn, cut off the cob - frozen is okay too
  • 1 cup milk (I used unsweetened soy milk)
  • 6 oz sharp cheddar, grated
  • salt and pepper, to taste
  1. Cut bacon into penny-size pieces and cook in soup pot until crispy. Remove bacon and place over paper towel to absorb excess grease.
  2. Leaving bacon grease in pot, add onion and garlic and saute over medium heat until soft.
  3. Sprinkle in flour and stir. Cook for 2-3 minutes.
  4. Add potato and chicken broth, and cook until potatoes are tender.
  5. Add milk and corn and bring up to a low simmer. Cook for 3 minutes, but do not let it come to full boil.
  6. Stir in cheese and allow it to melt. Also add in the cooked bacon. Using immersion blender, blend to desired chunkiness. I blended about half so it's creamy and still pretty chunky.
  7. Salt and pepper to taste.

Wednesday, June 15, 2011

Je T'adore Crepes


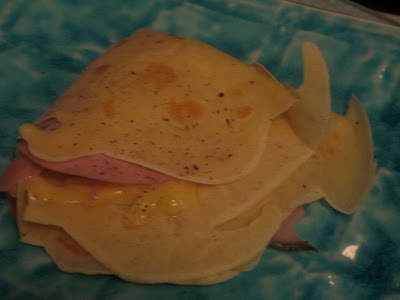
Crepes evoke so many different memories. They make me think of eating a Nutella and banana crepe in a Parisian park, mushroom and cheese blini (a Russian crepe) in downtown Moscow, and of a crepe cafe in Oakland which my husband and I visit a couple times a year. The great thing about crepes is their versatility. They can be sweet or savory, they can be for breakfast, lunch, dinner, or just a snack, but they are always a special treat.

The history of crepes begins with the basic pancake. People have been making flat, unleavened dough since prehistoric times, and they were probably round in reverence to the sun. Almost every culture has its own version of the pancake. The French eat crepes, the Russians eat blinis, Americans eat pancakes, Indians eat lentil cakes, and Mexicans eat tortillas.


It's not hard to make crepes and you don't need one of those fancy griddles or a special tool to spread the batter around. To get kids involved let them choose what fillings they want and they can create their own crepe.

Here is a basic crepe recipe:
  • 2 eggs
  • 3/4 cup milk
  • 1/2 cup water
  • 1 cup flour
  • 3 tablespoons melted butter
  • 1/4 teaspoon salt
  • if you are making sweet crepes, you can also add a couple tablespoons sugar and a tablespoon vanilla extract
  • or if you are making savory crepes, you can add some finely chopped fresh herbs
  1. In a blender, combine all ingredients and pulse for 10 seconds.
  2. Place batter in refrigerator for at least an hour. This allows the bubbles to dissolve.
  3. Heat small non-stick pan and add butter to coat. You will need something to measure out 1.5 ounces- I usually use a shot glass which is about the perfect size.
  4. Pour 1.5 ounces of batter into the pan and swirl around to spread it evenly around. let cook for 30-60 seconds and flip the crepe. Cook for another 30-60 seconds. If you are using some ingredients you want to melt (like cheese) you can place them on the crepe while the second side is cooking.
  5. Fill your crepes with whatever ingredients you desire and really get creative! You can roll your crepes like an enchilada, fold in halve or in fourths.
Filling Ideas:
  • scrambled eggs
  • grilled veggies- onions, zucchini, peppers
  • cheese- brie, Comte, goat cheese
  • meats- bacon, ham, turkey slices
  • fruits- banana, apple, berries, peaches
  • peanut butter or Nutella
  • ice cream

Friday, June 10, 2011

Baconfest at Slater's 50/50

So you may be wondering, "Where's the bacon?" It's at Slater's 50/50, the best place to get a bacon burger on the west coast. Located in Anaheim, California, this rivals Disneyland as the happiest place on earth.


Every part of this burger is amazing. The brioche bun is fluffy like a cloud and so light you barely know it's there. You get to build your own burger so you put exactly what you want on it. I order my burger with bacon (of course), brie, caramelized onions, and lettuce. You haven't heard the best part yet. The burger patty is 50% ground beef and 50% ground bacon. If you get the 50/50 patty, it has to cooked well done because of the pork, but looks pink inside still. It doesn't scream bacon, but has a hint of bacon and is super juicy. It is, hands down, the best burger I've ever had.

The Baconfest doesn't end with the burger.


Yes, this is a bacon (and maple) milkshake. If you are thinking "grossss!" then you are so wrong! Although it might not be for everyone, it's far from bad. It's sweet and salty, and reminds me of pancakes with maple syrup and bacon. You must have one of these to accompany your bacon burger. There is also a bacon brownie on the menu; skip it. It's just a brownie with bacon on top and it's not that great.


Saturday, June 4, 2011

I Heart Tarts


There was a point where I was obsessed with making tarts. It all started when I ran across Andre Soltner's recipe for his famous tart a l'oignon. Andre Soltner was born in 1932 in Alsace, France, where tarts such as this one, are traditional cuisine. Soltner is known for popularizing fine French cuisine in the United States. He became the chef-owner of Lutece, a fine French restaurant in Manhattan, and Lutece was famous not only for its chef, but for its tart a l'oignon, the exact onion tart that began my obsession.

You will need a couple things to make Soltner's Alsation Onion Tart: a tart pan and some patience (if you attempt to make your own pastry. You can always buy premade pie pastry. I won't judge you.). This thing took 4 hours in total to make the first time (I have since gotten much quicker)! But this is art and so worth the time and energy it took to make it. The ingredients are really simple, but all together, it's something much, much more. It's light and creamy, yet rich in flavor. The bacon doesn't over-power the onion, but compliments it perfectly.

For pastry:
  • 2 cups flour
  • 1 stick butter- cold and cut into small cubes
  • 1/4 cup vegetable shortening
  • 1/2 teaspoon salt
  • 4 tablespoons ice-cold water
For filling:
  • 4 slices bacon (1/4 lb)- cut into small pieces
  • 3 tablespoons butter
  • 2 lbs onion, thinly sliced or chopped
  • 1 1/4 teaspoon salt
  • 1 teaspoon black pepper
  • 1 cup creme fraiche or heavy cream
  • 4 large eggs
  • 1/2 teaspoon freshly grated nutmeg
  1. First start by making the pastry. Blend together flour, butter, shortening, and salt in a bowl with a pastry blender or pulse in a food processor (I blended mine with a pastry paddle in my Kitchenaid). Blend just until most of mixture resembles course meal with small pea-size lumps. Drizzle with cold water and gently stir with a fork or pulse processor until incorporated.
  2. Being careful not to over-mix, roll dough into ball, split in half, and wrap each ball in plastic to keep it from drying out. Put in fridge for at least an hour.
  3. Roll dough out on floured surface with floured rolling-pin. Fit into a tart pan and trim excess dough. Put back into fridge for 30 minutes.
  4. Line shell with tin foil and fill with pie weights (I used rice). Bake at 400 degrees for 15-20 minutes. Remove foil and weights and bake shell for 10-15 minutes or until golden brown.
  5. While the crust is cooking, start on the filling. Cook the bacon in large skillet over moderate heat until crisp. Transfer bacon to paper towels to drain and pour off bacon fat. Add butter to skillet and cook onions with 3/4 teaspoon salt and 1/2 teaspoon pepper, until wilted. Cover skillet and continue to cook, stirring occasionally, until very soft and pale golden. Stir in bacon and remove from heat to cool.
  6. Whisk together cream, eggs, nutmeg, 1/2 teaspoon salt, and 1/2 teaspoon pepper. Then stir in onion and bacon.
  7. Pour filling into shell, spreading out onions evenly, and bake for 25-35 minutes. It's ready when the filling is set and the top is golden. 

I love that I can use a basic formula and add whatever ingredients I want to make my own tart. Here are a couple more of my favorite recipes.

Goat Cheese Tart
Here is a link to a friend's recipe for her goat cheese tart which inspired my own version: Sliced Strawberries' Goat Cheese Tart. I stuck with Soltner's pastry recipe and here is my filling:
  • 1 cup finely chopped shallot and garlic
  • 2 tablespoons butter
  • 10 oz soft goat cheese
  • 1 cup creme fraiche or heavy cream
  • 4 large eggs
  • 1 1/2 tablespoons chopped fresh rosemary
  • 1/2 teaspoon salt
  • 1/4 teaspoon black pepper
  1. Follow steps 1 through 4 from Soltner's recipe above.
  2. While the crust is cooking, start on the filling. Saute the shallots and garlic in butter until fragrant and tender.
  3. Mix together the goat cheese, cream, eggs, rosemary, salt and pepper until smooth. Mix in shallots and garlic. Pour filling into the shell and bake for 30-40 minutes. It's ready when the filling is set in the middle.

The Man Tart
This tart combines potato, onion, bacon, and Gruyère, but still manages to be light! I like to call this my "man tart" because men love it. For filling:
  • 2-3 slices of bacon, chopped
  • 1 cup finely chopped onion
  • 1 medium potato, peeled and grated (with cheese grater, wring out excess water)
  • 2 tablespoons butter
  • 1 cup Gruyère cheese, grated
  • 1 cup creme fraiche or heavy cream
  • 4 large eggs
  • 1/2 teaspoon salt
  • 1/2 teaspoon black pepper
  1. Follow steps 1 through 4 from Soltner's recipe.
  2. While the crust is cooking, start on the filling. Cook the bacon in large skillet over moderate heat until crisp. Transfer bacon to paper towels to drain and pour off bacon fat.
  3. Add butter to skillet and cook onions with 1/2 teaspoon salt and 1/2 teaspoon pepper, until wilted. Add potato and cook until tender.
  4. Mix together the cream and eggs until smooth. Mix in the potato and onion mixture, the cheese, and the bacon. Pour filling into the shell and bake for about 30 minutes. It’s ready when the filling is set in the middle.

Delicious!