Showing posts with label Main Course. Show all posts

Sunday, December 2, 2012

Sweet Potato Gnocchi

I'm not a huge fan of sweet potatoes, but they've redeemed themselves in my book for this use. While in Austin a few weeks ago I had some sweet potato gnocchi that were insanely delicious; they were fluffy and super buttery and rich. Then I got a couple sweet potatoes in my CSA box around Thanksgiving so set off to make my own sweet potato gnocchi.

I substituted sweet potatoes for regular potatoes in my great-grandmother's gnocchi recipe and served them in a meat ragu which I'll also provide the recipe for here. Making everything is a big endeavor, but so worth it. I also discovered that the gnocchi in the meat ragu freezes quite well; just defrost and bake to before serving. As an easy alternative you can skip the meat ragu and toss the gnocchi in browned butter with fresh sage.


Ingredients:

  • Meat ragu (recipe to follow)
  • 2 large sweet potatoes
  • 1 stick butter, melted
  • salt
  • approx 3 cups of AP flour 
  • 2-3 egg yolks
  • Parmesan, shredded
  1. Wash the sweet potatoes and piece a few times with a fork. Place in oven at 400 for 45 minutes or until cooked through. Remove from oven and allow to cool enough to handle. 
  2. Cut lengthwise and remove insides from skin. Put potato through ricer to get smooth texture. 
  3. Place potato in large bowl and mix in melted butter and add 1 tablespoon of salt.
  4. To make dough, start by combining the potato with an equal amount of flour (So if you have 2 cups potato use 2 cups of flour). I used a stand-up mixer with the paddle attachment and then dough hook, but you can use your hands too, but don't over mix. 
  5. Once flour and potato is combined add 1 egg yolk and mix until combined. Continue to add 1 egg yolk at a time until dough comes together. Usually it takes 2-3 yolks. The dough should be spongy and just dry enough to handle. You can add more flour if dough is too wet. 
  6. Place dough onto floured surface and shape into ball. Cut into 8ths so it's easy to handle.
  7. Take each piece of dough and roll into long 1 inch thick rope. Then off 1 inch long pieces from rope. Dust pieces of gnocchi with flour. Using your thumb, roll each piece across a gnocchi board or around a fork and place on dusted sheet pan. 
  8. Once all gnocchi are created, bring a large pot of salted water to rolling boil. Then gently place gnocchi into water in batches so they don't crowd and stick together. Cook for 4 minutes and taste gnocchi to make sure cooked properly and adjust cooking time if needed. Remove cooked gnocchi from water and place directly into warm sauce as others cook. 
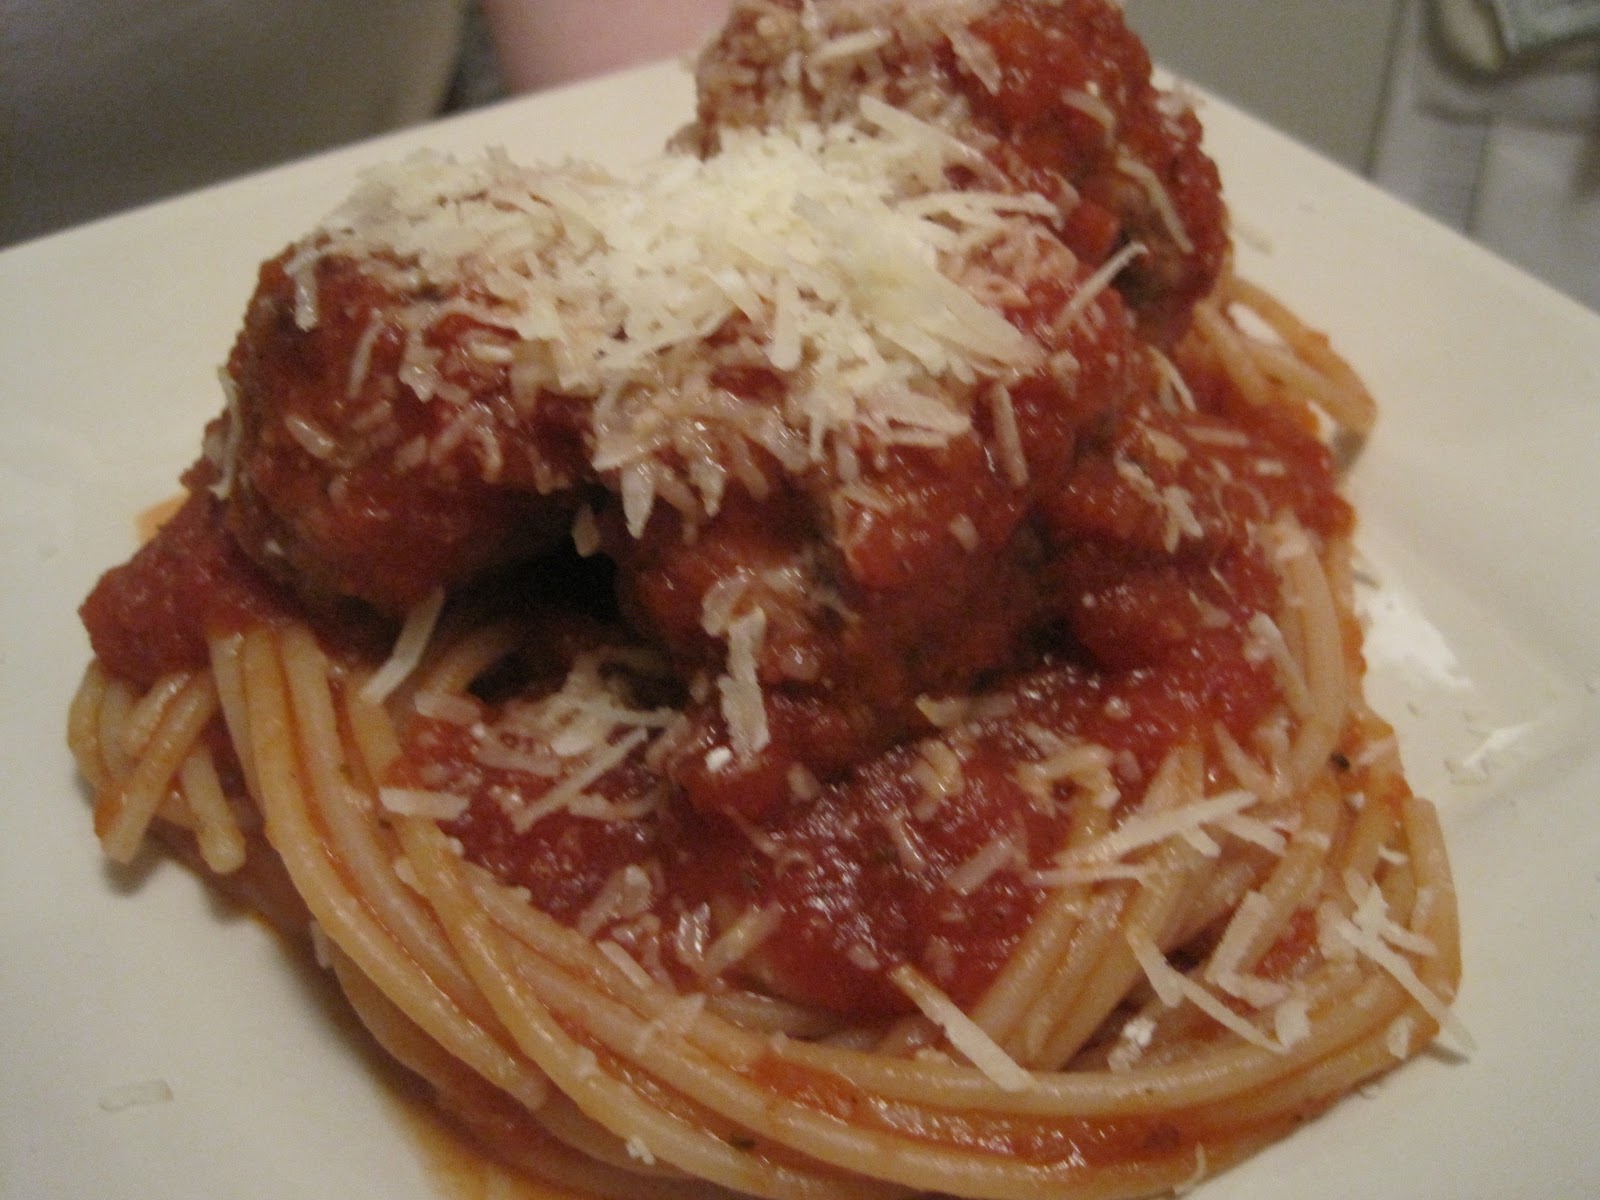
  9. Serve immediately, sprinkled with Parmesan. Or refrigerate/freeze in sauce and reheat by baking in covered dish. 
Meat Ragu Ingredients:
  • 1 onion, chopped
  • salt and pepepr
  • 2 tablspoons olive oil
  • 4 cloves garlic, chopped
  • 2 tablespoons dried oregano
  • 1/2 lb ground beef
  • 1/2 lb Italian sausage, removed from casing
  • 2 cups red wine (Merlot, Zin, Sangiovese, etc)
  • 1-28oz can of tomato puree
  • 1-6oz can of tomato paste
  1. Heat olive oil in large pot. Add onion and garlic, season generously with salt and pepper and cook until begins to soften. 
  2. Add oregano and cook for 2 more minutes. 
  3. Add beef and sausage. Break up into small pieces and cook through. 
  4. Pour in wine, tomato sauce, and tomato puree, and mix to combine.
  5. Using immersion blender, puree only slightly (about half of sauce).
  6. Allow ragu to simmer for 2 hours. It should be thick, but if it thickens too much add a little water. 

Wednesday, September 12, 2012

Croxetti Con Sugo Blanco

You may have noticed that I haven't blogged much. I haven't given it up, but I've been focusing on find myself, culinarily speaking. I've spent a lot of time learning about regional Italian cooking and, in particular, researching the cuisine from the area where my great-grandmother, Gram, is from. I've got family from all over Italy, but I was close to Gram and when I think of comfort food, it's her cooking that comes to mind. Gram came from Grondola, which is a village within the commune of Pontremoli. It lies in the northeast corner of Tuscany (land of the peasant bean-eaters), near the borders of Liguria (where pesto hails from) and Emilia-Romagna (a gastronomic nirvana). Additionally, Pontremoli is where many trade routes over the Appenine mountains converged and it lies on the Via Francigena, an important pilgrimage route in medieval times. The cuisine of Grondola is centered around local ingredients, but is influenced by the heavy interaction with its neighbors throughout history.


Croxetti con sugo blanco is a simple, but delicious dish that makes me feel close to Gram. Croxetti is pasta shaped like large flat coins and have a coat of arms or ornate image stamped onto them. You probably won't find these at a supermarket, but can easily find them at an Italian specialty shop (like I did) or on the Internet. Croxetti cook up just like any other dried pasta and then the white sauce is made in a matter of seconds in a food possessor. It's similar to a creamy pesto, but uses marjoram rather than basil and not so much of it. 


Ingredients:
  • 1 pound dried croxetti pasta
  • salt and pepper
  • 4 tablespoons unsalted butter
  • 1 cup pine nuts
  • 2 cloves garlic, peeled and roughly chopped
  • 1/4 cup olive oil
  • 1/4 cup whole milk
  • 1/4 cup chopped marjoram
  • freshly grated Parmesan, for garnish
  1. Melt butter over low heat and then remove to cool. 
  2. Bring large pot of salted water to a boil. Cook pasta according to package directions, but do not overcook. Reserve 1 cup of pasta water and then drain. 
  3. Place into food processor the pine nuts, garlic, olive oil, milk, and marjoram. Add pinch of salt and pepper. Pulse to combine. Then slowly add the butter to prevent the sauce from creating a foam, continuing to blend. Season to taste. Sauce should be thick at this point.
  4. Thin the sauce with a few tablespoons of the reserved pasta water and then toss with the drained pasta. 
  5. Serve immediately, garnished with grated Parmesan. 


Wednesday, April 4, 2012

Mmmm... Meatballs and Spaghetti

Italians eat spaghetti. Italians eat meatballs. Italian do not, however, eat spaghetti and meatballs. That is an American invention and a splendid one at that.


My husband, Jimmy, and I had lunch at an Italian restaurant one day where Jimmy ordered their famous giant meatball (yes, just one as this thing was the size of a softball) with spaghetti. His meatball was bland and crumbly. I promised him that I would make him the best meatball he's ever had. And I did. Combining ground beef, pork, and pancetta, packs a huge punch of flavor. My meatballs are rich, moist, and far from bland. This recipe makes a lot of meatballs and is great for entertaining a large crowd. I love making meatball subs with the leftovers too!

Meatballs Ingredients:
  • 1 1/2 cups Panko bread crumbs
  • 1 cup milk
  • 2 eggs
  • 1 lb lean ground beef
  • 1 lb lean ground pork
  • 6 oz pancetta, finely chopped
  • 2 cloves garlic, smashed into a paste
  • 1 cup grated Parmesan cheese
  • 1/4 cup minced fresh Italian parsley
  • 1 teaspoon powdered gelatin, dissolved in 2 tablespoons cold water
  • 1 teaspoon salt
  • 1/2 teaspoon pepper
Sauce Ingredients:
  • 2 tablespoons olive oil
  • 1 onion, finely chopped
  • 4 cloves garlic, minced
  • 1/2 teaspoon red pepper flakes
  • 1 teaspoon dried oregano
  • 2 cups red wine
  • 2-28 oz cans San Marzano tomatoes, with juice
  • 1-6 oz can tomato paste
  • salt and pepper, to taste
  • sugar, to taste
  • grated Parmesan, for serving
  • 2 lbs spaghetti
  1. Start by making meatballs. Preheat oven to 400F and spray 2 baking sheets with non-stick spray or olive oil. 
  2. In a large bowl, mix together the Panko and milk, letting it sit for a few minutes and mash with a fork against the side of the bowl. Then add all the rest of the ingredients and fold everything together. 
  3. Roll into meatballs about the size of a golf ball and place on the baking sheets. This will give you about 30-40 balls. Place in oven and set timer for 25 minutes. When meatballs are done, remove from the oven and reduce heat to 300F. 
  4. While meatballs are cooking, start on the sauce. In (very) large pot, heat olive oil over medium heat and saute the onions  with a couple pinches of salt until translucent. Add the garlic, red pepper flakes, and oregano, and cook for 2-3 minutes more.
  5. Pour in the wine, tomatoes, and tomato paste, and bring to a boil. Reduce to a simmer and cook for 10 minutes. Use an immersion blender to puree the sauce. Simmer for another 10 minutes. 
  6. Adjust taste using salt, pepper and sugar. Use a teaspoon of sugar at a time- this will deepen the flavor, but don't use too much. You can also add more oregano right now if you'd like. 
  7. Place the meatballs into the sauce and try to get them mostly covered with sauce. Cover pot with foil and place in the oven for 1 hour. 
  8. In separate pot, cook the spaghetti according to the package directions minus 1 minute. Drain the spaghetti and return to the pot. Stir in a little sauce from the meatballs. 
  9. To serve, place spaghetti on a plate and then top with 2-3 meatballs plus more sauce and a sprinkle of Parmesan. 

Monday, January 30, 2012

Bucatini Alla Matriciana


Bucatini alla Matriciana is one of the most famous Roman dishes (right next to Spaghetti alla Carbonara and Bruschetta) and yet you have, more than likely, never heard of it. Probably because at the center its flavor profile is guanciale which is cured pork jowl or cheek. If that scares you or if you just can't find it where you live, then you can substitute pancietta or bacon and still have a delicious meal, but you'd be missing out on some serious authentic Italian flavor. There are tomatoes in the sauce, but the tomato is far from the star; the rich guanciale and Pecorino Romano take center stage here. If you want to take a bite out of Italy the key is using Italian ingredients. It gets a bit pricey for the real deal, but well worth it and lot cheaper than a plane ticket to Rome. 

Ingredients:
  • 1/2 lb guanciale, cut into cubes/lardons
  • 2 small/medium yellow onions, diced
  • 3 cloves garlic, minced
  • 1/2-1 teaspoon crushed red pepper flakes, depending on your preference
  • salt to taste
  • 1 28 oz can San Marzano Tomatoes, diced, plus the juice
  • 1 lb bucatini pasta, cooked 1 minute less than directed on package (buy the best quality pasta you can find)
  • 1 cup grated Pecorino Romano plus more for garnish
  • Olive oil
  1. Cook the guanciale over medium-low heat in large skillet until fat is rendered out. Remove most of fat, leaving ¼ cup in pan.
  2. Add onion, couple pinches of salt, and red pepper flakes. Cook until onions become translucent. Add in garlic and cook for a couple minutes more.
  3. Add tomatoes and bring sauce to a boil. Reduce to low simmer and cook for 1 hour. The sauce should reduce into a thick paste.
  4. Toss the pasta into the sauce. Add cheese and drizzle of olive oil to help the cheese bind to the sauce. Toss until sauce is evenly distributed.
  5. Serve topped with more cheese. 

Monday, January 23, 2012

The Croque Monster


I am a San Francisco girl, born and raised in the east bay, and my heart is broken over the 49ers loss yesterday. What better way to deal with disappointment than with bacon? I'm making a croque monsieur for dinner tonight, which is basically a fancy, French named for grilled ham and cheese sandwich. I had to make these in culinary school where I started calling it a "croque monster" and the name just stuck.

There are countless varieties of a croque monsieur. Aside from using Canadian bacon instead of ham, I'm going pretty traditional. I've got white bread with crusts removed, a Swiss cheese (Gruyere), and bechamel sauce. It sounds simple, and it is, but it's so delicious. It's crunchy on the outside and ooey-gooey cheesy on the inside. 

Ingredients (makes 4 sandwiches):
  • 8 slices white bread, crusts removed, toasted, and lightly buttered on both sides
  • 16 small slices/8 oz Swiss cheese (Gruyere or Emmental)
  • 8 oz sliced ham (or Canadian bacon)
  • 1 tablespoon butter 
  • 1 1/2 tablespoons AP flour
  • 1 cup hot milk
  • 1/2 teaspoon salt
  • pinch of nutmeg
  1. Preheat oven to 400.
  2. First make bechamel sauce. Place butter in sauce pan and melt over low heat. Once, melted, add flour and stir for 2-3 minutes. Slowly whisk in milk. Increase heat to medium, stirring continuously until thickened. Season with salt and nutmeg. Remove from heat and cover with plastic film to prevent film from forming until ready for use. 
  3. Place a slice of cheese on each piece of buttered toast and put it in the oven until the cheese is meted.
  4. Warm the ham either in a skillet or grill top - or a microwave will do too. 
  5. Assemble the sandwich, placing 1 oz of ham on one slice of bread and a smear of bechamel sauce on the other. Gently push the 2 pieces of bread together and slice diagonally. Variation: Instead of putting the bechamel sauce in the sandwich, you can pour it over the top, making it a knife and fork sandwich. 


Thursday, January 12, 2012

Speedy Butter Chicken


still remember the first time I ever tried Indian food. I was backpacking in Europe after graduating high school and we went to Wales for a weekend to visit a friend. They eat a lot of Indian food in the UK and my friend ordered some take out from a local restaurant. I don’t remember what we ate, but I remember the flavors were like nothing else I’d ever eaten before. It was spicy, rich, and so flavorful. I was immediately hooked.

Chicken tikka masala is probably the most popular Indian dish despite the fact that it technically isn’t from India. Chicken tikka masala was invented in England, and although the origins are disputed, it is most likely spin off of Murgh Makhani, or butter chicken, which is an Indian dish. Butter chicken was invented by Kundan Lal Gujral who owned a restaurant in Peshawar named Moti Mahal. While trying out new recipes, Gujral tried cooking chicken in tandoors, which were ovens used by locals to cook bread. And so Gujral had invented tandoori chicken. Punjab was partitioned in 1947 and Gujral fled to India with thousands of other Hindu refugees. He re-opened Moti Mahal in Daryagani, Delhi, and the popularity of tandoori chicken soon spread. The leftover tandoori chicken didn’t keep too well as it would dry out quickly. So in order to keep the chicken moist, one of the chefs at Moti Mahal invented a tomato-based gravy, and so was born butter chicken.

Kundan Lal Gujral’s grandson, Monish Gujral, published a Moti Mahal cookbook where he gives the original recipe for butter chicken. Simply do an Internet search for “Moti Mahal’s Murgh Makhani” and it will be easy to find. It's quite involved though so I've created this quick version that might be just as delicious. 

Ingredients:

  • 1 rotisserie chicken, white and dark meat cut into bite-size chunks
  • 4 tablespoons butter
  • 1 onion, finely diced
  • 2 cloves garlic, minced
  • 1 tablespoon Garam Masala
  • 1 teaspoon fenugreek powder
  • 1 teaspoon cumin
  • 1 teaspoon chili powder (optional)
  • 2 heaping tablespoons tomato paste
  • 1 cup cream
  • 1/2 cup roasted cashew pieces
  • salt, to taste
  • Serve with basmati rice and naan.
  1. In large skillet, melt butter completely over medium heat. Add onion and cook until soft.
  2. Reduce heat to medium-low. Add garlic and spices, and allow to cook for a couple minutes in the butter. 
  3. Stir in tomato paste and cook for another minute. Add cream and cashews, and salt to taste. Toss chicken in the sauce and allow to simmer for 3 minutes over low heat before serving. 

Monday, December 5, 2011

Meatloaf and Mashed Potato Cupcakes

You are probably thinking that the words "meatloaf" and "cupcakes" should not be used in the same sentence, let alone in the same recipe title. Have no fear, these are just mini-meatloaves topped with mashed potatoes. They just look like cupcakes.


You can use your own recipes for meatloaf and mashed potatoes, but I'll provide basic ones as well. Simply bake the meatloaf in a cupcake pan. For an extra surprise, inject some ketchup or BBQ sauce into the center of the meatloaf using a small piping tip before baking them. Once slightly cooled, top your meatloaf cupcakes with mashed potato frosting using a large piping tip, an ice cream scoop, or a spatula.

Basic Meatloaf Ingredients:
  • 1/2 onion, chopped small
  • 1 red bell pepper, chopped small
  • 1/2 tablespoon cooking oil
  • 1 lb lean ground beef
  • 1 egg
  • 1 cup panko bread crumbs
  • 1 tablespoon salt
  • 1/2 tablespoon pepper
  1. Saute the onion and pepper in cooking oil until soft. Allow to cool. 
  2. Mix together sauteed vegetables, ground beef, egg, panko, salt, and pepper, being careful to not over-mix.
  3. Place meat mixture into cupcake tins and bake at 350 for 30 minutes or until the meatloaves reach 165 degrees. 
  4. Remove from cupcake tin and place on paper towels to absorb excess fat.
Basic Mashed Potato Ingredients:
  • 5 medium yellow or red potatoes, peeled and quartered
  • 1/2 cup heavy cream
  • 2 tablespoons butter
  • salt and pepper to taste
  1. Boil potatoes in salted water until fork tender.
  2. Put potatoes through a ricer for perfectly smooth consistency. 
  3. Mix in cream, butter, and salt and pepper to taste.

Friday, November 25, 2011

Not Just for Thanksgiving Turkey and Stuffing

Both my family and my husband's family live 300+ miles away and this year we were unable to make the long drive to see them. We still wanted traditional Thanksgiving turkey feast, but without all the big fuss of a whole bird. First, start with your favorite stuffing and spread it across a baking dish. Top it with some turkey cutlets, brushed with sage and butter, and bake. Downside to not cooking a whole turkey is not having the drippings to make a delicious gravy. Just buy some turkey stock, add to a roux with some sage, and, voila, you've got gravy - problem solved. This dish is so easy, I make it all year round.


Ingredients:
  • 1 batch of your favorite stuffing - or use my recipe below
  • 5-6 turkey cutlets
  • 1 tablespoon butter
  • 1 tablespoon vegetable oil
  • 1 teaspoon salt
  • 1/2 tablespoon dried, ground sage
  • Gravy - recipe below
  1. Spread stuffing into a 9x13 baking dish.
  2. Melt butter. Add in the vegetable oil, salt, and sage, and whisk together. Brush onto both sides of the chicken cutlets. 
  3. Place chicken cutlets over the top of the stuffing. 
  4. Cover and bake for 20 minutes at 350. Remove cover, and bake 10 minutes. Flip over turkey cutlets and bake another 10 minutes. Turkey and stuffing should both reach a temp of 165F. 
Stuffing Ingredients:
  • 2 tablespoons butter
  • 1 onion, chopped
  • 1 apple, peeled/cored and chopped
  • salt and pepper
  • 1 tablespoon dried, ground sage
  • 6 cups croutons - dice any kind of bread and toast in oven until dried out
  • 1/2 cup almond slivers
  • 2 cups + turkey stock
  1. Saute the onion and apple in the butter with some salt and pepper, and the sage. 
  2. Add croutons and almond slivers, and mix together.
  3. Slowly add in turkey stock and mix well. I like my stuffing moist like it came out of the bird, so I use extra stock. Use more or less, depending on your preference. 
Easy Turkey Gravy Ingredients:
  • 2 tablespoons butter
  • 2 tablespoons flour
  • 1 tablespoon dried, ground sage
  • 2 cups turkey stock
  • salt and pepper to taste
  1. Over medium heat, melt butter. 
  2. Add sage and flour and cook for 2-3 minutes, stirring with a whisk. 
  3. Slowly add in turkey stock, whisking continuously. Increase heat and bring to a simmer. Gravy should be thickened by now.
  4. Reduce heat and season to taste with salt and pepper.

Monday, October 10, 2011

Italian Style Braised Short Ribs


These rich Italian style braised short ribs will impress your diners, but also impart a sense of comfort. Although it takes a long time to braise, the hands-on cooking time is not long at all. It can also be served a variety of ways. I usually serve the short ribs over creamy Parmesan polenta, but it would be good as a sauce for cheese tortellini or along side some garlic mashed potatoes.

Ingredients:
  • 2 lbs beef short ribs
  • 1 tablespoon olive oil
  • 1/2 onion, chopped
  • 2 carrots, chopped
  • 2 stalks celery, chopped
  • 6 cloves of fresh garlic
  • 1 tablespoon tomato paste
  • fresh herbs: thyme, bay leaf, and/or rosemary
  • 1 cup red wine
  • 2 cups beef stock
  • salt and pepper
  • Parmesan for garnish
  1. Preheat oven to 250. 
  2. Rub short ribs with salt. In large pot, sear ribs in olive oil. Do in batches in necessary. 
  3. Set meat aside. Add onion, carrots, celery, and garlic to pot and brown well. Add in tomato paste, wine, and beef stock, and deglaze pot. Bring to a simmer. 
  4. Tie herbs together with a string and add to the pot. Add back in ribs, cover, and place in oven. 
  5. Cook for 2 hours, stirring occasionally. Remove the lid and cook for another hour. The meat should be very tender.
  6. Remove the meat from the pot and cut into portions or shred if being used as a sauce. 
  7. Remove the herbs, and using an immersion blender, puree the vegetables and liquid. Simmer to reduce if necessary. Add back in the meat and season to taste. Serve sprinkled with grated Parmesan.
To make a creamy Parmesan polenta, follow instructions on package of instant polenta. I used 1/4 cup instant polenta to 1 cup water and this makes 2 servings. Add in 2 tablespoons of cream and 2 tablespoons of grated Parmesan. Salt to taste. 

Sunday, October 9, 2011

Not-So-French Dip


A French dip is a simple sandwich of thinly sliced roast beef on a baguette or french roll that is dipped in beef "jus." It's origins are not French at all, but has it's roots in Los Angeles, California. According to Philippe of Philippe's restaurant, a policeman eating a roast beef sandwich "saw some gravy in the bottom of a large pan of roast meat. He asked me if I would mind dipping one side of the French roll in that gravy. I did, and right away five or six others wanted the same." And so was born the beef dip sandwich. Philippe's was affectionately called Frenchy's and so the beef dip soon became known as the French dip.


I like to braise tri-tip for my French dip sandwiches. If you aren't from California then you might not be familiar with this cut, but you can ask your butcher for part of the triangle muscle from the bottom sirloin. It is a lean muscle so there is usually a cap of fat attached to the tri-tip. I remove this as braising will keep the meat moist enough.

Ingredients:

  • approx 1.5 lb tri-tip with fat cap removed
  • salt and pepper
  • 1 tablespoon olive oil
  • 4 cups beef stock
  • 6 crusty French rolls
  • horseradish, optional
  1. Preheat oven to 350.
  2. Rub tri-tip with salt and pepper. 
  3. Sear both sides of the tri-tip in olive oil over high heat in large pan. 
  4. Pour beef stock over tri-tip, deglazing the pan and scrapping up the caramelized bits from the bottom of the pan. Place pan in oven, uncovered. Cook for approx 45 minutes or until meat is cooked to 145 degrees, turning half way through. For well done, cook to 155 degrees. 
  5. Remove tri-tip from jus and allow to rest for 10 minutes. Set jus aside and toast bread while waiting for meat to rest. 
  6. Thinly slice tri-tip and place in toasted bread, served with jus on the side. For a little kick, serve with horseradish. 

Saturday, September 17, 2011

Italian Sausage Hero


This is more of a non-recipe, but it was so easy and delicious that I wanted to share it. Plus I learned something while trying to figure out what to call my sandwich. I was pretty impressed to find how serious people take their sandwiches on the east coast. They have so many names- grinder, sub, blimpie, hoagie, zep, po' boy, and the list goes on- while we just call them all "sandwiches" here on the west coast. I finally decided to call my sandwich a "hero" which implies it is served on a roll and has Italian flavors. In case you are wondering, the name has no relation to the Greek gyro.

I took a classic Italian combination of sausage, peppers, and onions, and stuffed it into a toasted roll. Squirt a little bit of spicy mustard on there and that is all you need for this flavorful Italian sausage hero. The sausage is the star of this dish so be sure to buy some nice Italian style ones. Or if you are feeling adventurous, make your own!

Ingredients:

  • 1/2 onion, cut into bite size chunks
  • 1 bell pepper, cut into bit size chunks
  • 4 Italian sausages
  • 1/2 tablespoon olive oil
  • 1/2 teaspoon salt
  • dash red pepper flakes
  • 4 hero rolls, sliced and toasted
  • spicy mustard
  1. Heat olive oil in large skillet and cook sausages- you want them to get dark and crispy on the outside so you some medium-high heat. Split the sausages in half lengthwise and put back in the skillet cut side down and get that nice and crispy too. Remove from pan.
  2. Reduce heat to medium and place onions and peppers in pan. Sprinkle with salt and cook until soft, stirring occasionally, until softened. 
  3. Cut sausage into bite size chunks and toss into onion and pepper mixture. Add red pepper flakes and just cook a minute, enough to reheat the sausage.
  4. Pull some of the stuffing from the middle of the toasted rolls so your filling has a nice pocket to go and won't spill out the sides. Stuff your heros and top with mustard if desired. 

Wednesday, September 14, 2011

The Perfect Pizza Pie


The dough is what makes a pizza good. It needs to have flavor, the perfect chew, and be crispy too..The main problem I used to have with making  pizza dough is keeping it thin. I'd roll out the dough and it would spring back on me. You need to use a high protein flour (bread flour rather than all purpose) to get a good chewiness to the crust, but too much gluten development and the crust will be tough and the dough will be too springy to roll out properly even after letting the dough relax.

I've got 2 secrets. First, use "00" flour. You can find this at specialty stores (I found it at a local Italian grocer) or buy it on the Internet. This flour has a lot of protein, but is highly refined and powdery. It really is worth the effort of getting the special flour. The second secret is letting the dough ferment in the refrigerator overnight rather than on the counter for a few hours. The cold slows fermentation so it has to be allowed a full day in the fridge (but don't let it go longer than 72 hours). The cold prohibits gluten development though. The benefits of this is full flavor will less stretch. The dough actually rolls out easily and doesn't spring back at all. The final result is a crispy, thin, and slightly chewy crust.

Top your pizza with whatever your heart desires. I like to keep mine simple with a little bit of tomato sauce, basil, vegan mozzarella, and a sprinkle of nutritional yeast. Sometimes I really like a pesto sauce with a ton of vegetables too. Cooking on a pizza stone is ideal, but if you don't have one, bake it on a cookie sheet until it's firm and then transfer directly to the oven rack so the bottom can crisp up.

Ingredients:
  • 3 cups "00" flour (16 1/2 oz)
  • 2 teaspoons sugar
  • 1/2 teaspoon instant or rapid-rise yeast
  • 1 1/3 cups cold water
  • 1 tablespoon light olive oil
  • 1 1/2 table salt

  1. In standing mixer with paddle attachment, combine flour, sugar, and yeast. Over low speed, slowly add in water- you may not need all of it- until dough forms into a ball and pulls away from the sides of the bowl. Switch to a dough hook attachment and mix for a couple of minutes, until dough is smooth. Allow to sit for 10 minutes (this allows the flour to hydrate).
  2. With the dough hook still attached, turn mixer onto low speed. drizzle in olive oil and add salt. Knead dough by letting mixer run at medium-low speed for 5 minutes. 
  3. Form dough into tight ball, place in lightly oiled bowl, and tightly cover with plastic wrap. Place in refrigerator for at least 24 hours, but no more than 72 hours. 
  4. Remove dough from fridge and, using a knife, cut into 2 even pieces to make 2 large pizzas or 4 even pieces to make 4 smaller (individual size) pizzas. Note that the dough is pretty tough and this is okay. As it warms to room temp, it will soften and relax. On lightly floured surface, form pieces into round smooth balls and allow to sit, covered, for 1 hour. 
  5. Preheat oven (and a pizza stone if you have one) to 500F with rack placed at the top of oven. 
  6. On lightly floured surface, squash a ball of dough into a flat disk and roll out thin. Place on pizza stone or baking sheet, and add pizza toppings. 
  7. Bake for 8-12 minutes, depending on size of pizza, or until crust is nicely browned. Place pizza on wire rack to cool for 5 minutes before serving. 


Tuesday, September 13, 2011

Spaghetti al Limone


This is currently my favorite dish to eat. This recipe for Spaghetti al Limone is super simple. It is exactly what you think; spaghetti with a light lemon sauce. You can add chicken and vegetables to it, but I think it's perfect just as it is. I got this straight out of Cook's Illustrated. Have you ever read this magazine? If not, you should. The writers attack a dish with passion and make it the best it can be by breaking down every aspect of the recipe, explaining their process and the science behind it. I love that they tell us what techniques don't work for a particular recipe and why. So I changed nothing about their recipe as I trust that they perfected it.

While enjoying this meal picture yourself in Italy, along the Amalfi Coast. You can serve the meal outside in the sun with a nice Pinot Gris and some soft Italian music playing in the background.


Ingredients:
  • 1 lb spaghetti (dried)
  • 1/4 cup good quality extra virgin olive oil
  • 1 shallot, minced
  • 1/4 cup cream
  • 3 juicy lemons: get 2 teaspoons finely grated zest and 1/4 cup juice
  • 1/2 cup finely grated Parmesan cheese
  • salt and pepper, to taste
  • 2 tablespoons chiffonade of basil leaves
  1. Prepare pasta al dente (slightly underdone) according to package directions.
  2. Reserve 1 3/4 cups cooking water and set drained pasta aside. 
  3. Using same pot, heat 1 tablespoon olive oil over medium heat. Add shallot and pinch of salt, and cook until softened, about 2 minutes. 
  4. Whisk in 1 1/2 cups reserved pasta water and cream into pot, bring to a simmer, and cook for 2 minutes.
  5. Remove from heat and add back in pasta, tossing thoroughly to coat well. Stir in the remaining 3 tablespoons olive oil, lemon zest, lemon juice, cheese, and 1/2 teaspoon pepper. 
  6. Cover and let pasta stand for 2 minutes, tossing frequently and adjusting consistency with remaining 1/4 cup water. Stir in basil and season with salt and pepper to taste. 
  7. Serve individual portions sprinkled with more cheese and drizzled with more olive oil if desired. 

Wednesday, September 7, 2011

Southern Dumplings with Chicken

The combination of chicken and dumplings is universal (wonton soup, matzo ball soup, spatzle, tortellini, etc.), but nobody does it like they do in the southern United States. It became popular during the Great Depression because it was cheap and filling, but it's now a typical comfort food especially in the South. My husband has some Southern heritage so on holidays his family would serve dumplings in a blond gravy along side the turkey or ham. I had originally developed this recipe for him, but I love it as much as he does.


My recipe for Southern style dumplings with chicken is in a gravy-like broth so it is rich. I flavor it with a simple mirepoix (onion, carrot, and celery) and add lots of ground pepper. I use boneless, skinless chicken breasts and brine it to keep it super moist. I cheat a little bit by buying refrigerated biscuits (like Grands) for the dumplings which is a nice short cut and I don't miss the homemade dumplings much.

Ingredients:
  • 1 lb chicken breasts (boneless and skinless)
  • 1 quart cold water
  • 1/4 cup table salt
  • 1 tablespoon canola oil
  • 1/8 cup sugar
  • 2 tablespoons butter
  • 1 cup onion, chopped
  • 1/2 cup carrot, chopped
  • 1/2 cup celery, chopped
  • 1/4 cup flour
  • 4 cups chicken stock
  • 1/2 package refrigerated biscuits
  • 1 cup milk
  • salt and pepper, to taste
  1. First get your chicken in the brine. Add the salt and sugar to the water and mix. Place the chicken in the brine and refrigerate for 45 minutes. 
  2. Heat oil in a saute pan and cook the chicken until it's done. Set to the side to cool. 
  3. In soup pot, melt butter over medium heat. Saute the onion, carrot, and celery until starts to soften.
  4. Add flour and stir. Cook for  couple of minutes. Add chicken stock and bring to a boil. Reduce to low and broth should start thickening. 
  5. Cut biscuits into small pieces (they puff up a lot when cooking). Add to broth and allow to cook for 5 minutes. 
  6. Dice chicken into bite size pieces and add to pot. Add milk and season to taste. 

Sunday, August 14, 2011

Creamy Spinach and Chicken Pasta

Pasta tossed with spinach and chicken in a creamy garlic sauce is one of my husband's signature dishes.The creamy sauce is made from low fat milk and a small amount of Parmesan which gives it a deceptively rich taste. This dish always reminds me of the time he made it for us while on our honeymoon in the Bahamas. After a long day at the beach it was delicious!


Ingredients:
  • 1 tsp canola oil
  • 1 onion, chopped
  • 4 cloves of garlic, minced
  • 1 tablespoon flour
  • 1 cup milk (1-2%)
  • 1/2 cup chicken broth
  • 1 lb chicken breasts, cubed
  • 2 cups fresh spinach, chopped
  • 4 cups farfalle pasta, cooked
  • 2 tablespoons grated Parmesan cheese
  • salt and pepper, to taste
  1. In a large skillet, sweat the onion and garlic in the oil for about 5 minutes.
  2. Add the flour and cook, stirring constantly, until flour is slightly browned, about 1-2 minutes.
  3. Stir in the milk and broth, and bring to a simmer. Sauce will start to thicken in 2-3 minutes. Stir in chicken, and return to a simmer. Cover and cook for 6-8 minutes, or until chicken is cooked.
  4. Add in spinach and allow to cook for just 1-2 minutes, until wilted. Season with salt and pepper.
  5. Add pasta and Parmesan cheese, and toss well. Serve with more Parmesan sprinkled on top if desired. 


Friday, August 12, 2011

Ernie's Tijuana Torte


I love potlucks at work because my coworkers make some awesome food! One of the many stars at these potlucks is Ernie's Tijuana Torte. It is a Mexican version of lasagna, layering tortillas with tomato meat sauce and cheese, and it is delicious! Ernie was kind enough to share his recipe with me which I made exactly as instructed (because you don't mess with perfection!).


My Tijuana Torte came out really saucy and the layers didn't really hold up, but I tend to have the same problem with traditional lasagna too. I think I put too much filling in between my layers so be sure to go light when you make this. Despite it's sloppy appearance, it tasted delicious! Now that I know how easy this is, I don't have to wait for a potluck next time I'm craving Ernie's Tijuana Torte. Thank, Ernie!
  • 1 tsp oil
  • 1 medium onion, chopped
  • 1 lb ground beef
  • 1-1 lb can of whole tomatoes
  • 1-8 oz can tomato sauce
  • 1-4 oz can diced green chiles.
  • 1 packet of taco seasoning, or make your own by combining cumin, chili powder, garlic powder, salt, paprika, etc.
  • Flour tortillas
  • 1 lb cheddar cheese, grated
  • 1.5 cups sour cream
  1. In large pan, saute onion in oil. Add ground beef and brown. Next, add the tomatoes, tomato sauce, chiles, and seasoning, and simmer for 15 minutes.
  2. Spoon the mixture into the bottom of a 9x13 casserole dish, creating a thin layer. Place a layer of tortillas over the mixture, tearing them if necessary. Spread more meat mixture over the tortillas and then a layer of cheese.
  3. Continue to layer tortillas, meat mixture, and cheese. Before adding the last layer of tortillas, spread the sour cream over the mixture.
  4. Bake for 30 minutes at 350 or until bubbly.

Friday, July 22, 2011

Beef in a Leaf

This is one of the delicious things my husband makes when he decides to cook. It is made of lean sirloin strips cooked in a spicy and sweet balsamic sauce and tossed with angel hair pasta, and eaten wrapped in lettuce leaves. We pulled it out of a Weight Watcher's cookbook many years ago and we love it because it's light, but satisfying, tastes great, is colorful, and fun to eat.

Ingredients:
  • 2 teaspoons olive oil
  • 1 pound lean sirloin steak, cut into strips
  • 3 tablespoons soy sauce
  • 3 tablespoons balsamic vinegar
  • 2 tablespoons honey
  • 1/2 teaspoon crushed red pepper flakes - or more if you like it hot!
  • 4 cups cooked capellini (angel-hair pasta)
  • lots of lettuce (large leaves)
  1. In large saute pan, cook steak in olive oil over medium heat.
  2. Add soy sauce, balsamic vinegar, honey, and red pepper flakes, and cook for 1 minute, stirring constantly.
  3. Add in pasta and toss. 
  4. Serve about 1/4 cup in each lettuce leaf. 

Tuesday, July 5, 2011

"Aunt Jackie's" Noodle Bake

When I got married, my mother-in-law gave me a recipe book of my husband's favorite childhood meals. The recipe he asks me to make most often is his Aunt Jackie's Noodle Bake. For him, it brings back memories of big family get-togethers and being at his aunts house after church on Sundays. It's amazing how food can transport you to a different time and place.
This noodle bake is pretty indulgent, but I use lighter ingredients if possible (like light cream cheese) and you can't tell that I made the substitutions.

Ingredients:
  • 1 lb ground beef
  • 1 teaspoon garlic powder
  • 2 teaspoons salt
  • 1 teaspoon pepper
  • 8 oz tomato sauce
  • 12 oz package egg noodles (I use pappardelle)
  • 4 oz cream cheese (light okay)
  • 1 cup sour cream (light okay)
  • 3 stalks of green onion, finely sliced
  • 1 1/2 cup shredded cheddar cheese
  1. In saute pan, cook ground beef and drain off fat.
  2. Add garlic powder, 1 teaspoon salt, pepper, and tomato sauce, and stir together.
  3. In pot, cook noodles according to package directions and drain. Add cream cheese, sour cream, 1 teaspoon salt, and green onion.
  4. Grease 9 x 13 baking dish with non-stick spray. Layer noodle mixture with meat mixture, and top with cheese.
  5. Bake for 30 minutes.

Tuesday, June 28, 2011

"Oh, Baby!" Back Ribs


These ribs will leave you saying "Oh, baby!" They are that amazing. The meat melts in your mouth and the flavors are exciting. It's like party in your mouth. These baby back ribs are easy to make too- it takes some time, but it's not difficult.

I live in a small apartment so I cook these in my oven. It takes a little planning as you need to put a dry rub on the ribs the night before and it takes 3 hours hours to cook. This recipe is made for 2 racks of ribs, but you can easily make less or more. I usually make 1 rack for every 2 people... or more if we want leftovers... which we always do.

Ingredients:
  • 2 whole racks of pork baby back ribs
  • 1/2 cup brown sugar
  • 2 tablespoons salt
  • 1 tablespoon chili powder (or more if you like it spicy)
  • 1/2 tablespoon cumin
  • 1/2 tablespoon onion powder
  • 1/2 tablespoon garlic powder
  • 1 cup white wine
  • 2 tablespoons white vingar
  • 2 tablespoons Worcestershire sauce
  • 2 cloves garlic, chopped
  1. You will need to apply the dry rub to your ribs the night before and let it sit overnight. Mix together brown sugar, salt, chili powder, cumin, onion powder, and garlic powder. Place a slab of ribs on a peices of heavy duty tin foil, shiny side down, and rub both sides of ribs generously with the seasonings. Fold up edges of foil to create a long tent and roll up the short ends. Repeat with other rack of ribs and place in fridge overnight.
  2. Preheat oven to 250.
  3. In small saucepan over medium heat, mix together the wine, Worchestershire sauce, vinegar, and garlic, and bring to simmer. Open up the ribs by unfolding one of the small sides and pour in equal amounts of the liquidto each. Fold back up the side and tilt to disperse evenly.
  4. Place ribs in oven and cook until meat pulls away from the bone and the bone ha good wiggle, about 2.5 hours.
  5. Remove ribs from oven and allow to cool slightly. Drain the braising liquid back into the saucepan by cutting a whole in the bottom of the tinfoil and allowing to drain. Reduce braising liquid into a sauce. The sauce will be ready when it can coat the back of a spoon. 
  6. Open the tin foil up completely and brush the ribs with the sauce.
  7. Place the ribs under the broiler until carmelization occurs.
  8. Brush the ribs again with sauce and serve.

Sunday, June 26, 2011

Cheese 'N Mac...'N Bacon

Macaroni and cheese may be America’s ultimate comfort food. For me, it brings back memories of my mom’s recipe (shells with Velveeta) that I ate as a kid, the semester I spent in college studying in Russia and eating Kraft Dinner to remind me of home, a New Year’s Eve party where I attempted to make fried macaroni and cheese, and a wonderful evening I shared with my mom, husband, and a good friend in a fine restaurant in Santa Barbara where I ate the best baked macaroni and cheese that I’ve ever had.


I love a good macaroni and cheese, but hate a bad macaroni and cheese. I can't stand when the cheese separates or it leaves a puddle of grease at the bottom of my plate. A good macaroni and cheese must be baked with a crispy top, but creamy on the inside.

You may be thinking I titled my blog entry incorrectly. The cheese should be the star and that is why I call it "Cheese 'N Mac." The cheese comes first! Unless there is bacon... Then it get complicated. Here is my recipe with note on what you can change to adjust it to your own tastes.

Ingredients:
  • 1/3 lb raw bacon, chopped in penny size pieces. If you don't want to use bacon, you will need a couple tablespoons of butter instead.
  • 2 shallots, minced
  • 2 cloves garlic, minced
  • 3 tablespoons flour
  • 4 cups milk (cool milk. If you use hot milk which some recipe say to do, you will get a lumpy sauce.)
  • 3 cups shredded cheese- use whatever you like or experiment with different combinations. If I'm using bacon, I love white cheddar and brie. I also like using half white cheddar and pepper jack. Or whatever I have in the fridge and need to use up.
  • Want to add sun dried tomatoes? Fresh herbs? Awesome! I love adding some chili powder for zing and extra smokiness.
  • salt and pepper, to taste
  • 1 lb cooked macaroni
  • 1/4 cup bread crumbs
  1. Preheat oven to 350.
  2. Cook bacon in medium sized pot until crispy. Leaving 2 tablespoons of grease in the pot, remove the excess bacon grease. If you aren't using bacon, just skip this step and cook the shallot and garlic in butter instead (in next step).
  3. Add shallot and garlic, and cook until fragrant.
  4. Add in flour and stir for about 3 minutes, until flour is cooked.
  5. Pour in milk and bring sauce up to a simmer. Sauce will start to thicken.
  6. Stir in cheese and other ingredients if you have them. Remove from heat once the cheese is melted.
  7. Season to taste and stir in macaroni.
  8. Pour into casserole dish and sprinkle with bread crumbs. Cook for 20 minutes. If the bread crumbs don't brown, place under the broiler.