Showing posts with label American Comfort. Show all posts

Sunday, September 23, 2012

Peach Shortcake Cookies

I had lots of peaches that had finally ripened and, only being able to eat so many in one day, I set about on a quest to find a recipe to use them up. I didn't want to do a pie or crumble or crisp or anything else predictable. I came across a recipe for strawberry shortcake cookies. Like the classic dessert, but in portable to-go cookie form. Genius! I substituted my peaches for strawberries, made a couple of adjustments to the recipe, and I was rockin' and rollin'.

You should not confuse shortcake with the sponge cake often used (incorrectly) in "strawberry shortcake." Shortcake is more like a sweet biscuit and is leavened with baking powder. The dough is really easy to make; in fact, just as easy as any other cookie dough. You can use almost any fruit in this recipe: peaches, strawberries, raspberries, blackberries, apricots, etc, so get creative!


Ingredients:

  • 3 cups chopped peaches (leave skin on) or any other fruit you want to use
  • 1/2 cup sugar, divided
  • 2 cups pastry flour
  • 2 teaspoons baking powder
  • 1/2 teaspoon kosher salt
  • 6 tablespoons cold butter, cut into cubes
  • 2/3 cup heavy cream
  • 1/2 tablespoon vanilla extract
  1. Preheat oven to 375F. 
  2. Toss fruit with 2 tablespoons of sugar and set aside.
  3. Combine the remaining 6 tablespoons of sugar, flour, baking powder, and salt.
  4. Add in butter and mix with hands until it resembles course crumbs. Then stir in cream and vanilla. Finally, add fruit and mix together. 
  5. Drop dough (about 2 tablespoons) onto cookie sheets lined with parchment paper or use silmats, leaving 2 inches between cookies. 
  6. Bake for 20-25 minutes, or until golden brown and edges are slightly crispy. 

Sunday, September 16, 2012

Sticky Buns

Fluffy clouds of ooey-gooey deliciousness is the best way to describe these! The dough itself is rich, soft, and moist. But the highlight of the sticky buns, is the glaze: sweet carmelized sugar and slightly salty, it finds its way into all the crevices between layers of dough so every bite is like party that melts in your mouth. This is a sure way to impress so make these for on a special occasion or holiday for breakfast or dessert. I'm usually not a big fan of sweets, but these sticky buns are amazing. And when fresh out of the oven, they are to die for!


Sticky buns are rolled pieces of rich, leavened dough that are compressed together into a baking loaf or pan which is lined with a sticky glaze. As it is baked, the glaze bubbles up and is absorbed into the buns, getting all in between the layers of dough. After cooling, the pan is turned upside-down so the glaze ends up on the top of the buns. You have to scale ingredients and there are many steps, but it is not hard. The final product will be well worth it!

Ingredients- Dough:
  • 4 oz butter (you can substitute 1-2 oz of butter for shortening to make dough easier to handle)
  • 4 oz sugar
  • 0.4 oz salt
  • 1 oz non-fat milk solids (dried milk)
  • 3 oz eggs
  • 8 oz water
  • 0.525 oz dry instant yeast (fast acting or rapid rise)
  • 1 lb bread flour
  • 4 oz cake flour
  • cinnamon-sugar
Ingredients- Glaze:
  • 1 stick butter
  • 1/2 cup sugar
  • 1/2 cup brown sugar
  • 1/2 cup corn syrup
  • 1 tsp vanilla
  • 1 tsp salt
  • 1 cup toasted pecans (optional)
  1. Start by making the dough. Using a paddle in an electric mixer, cream together the butter, sugar, salt, and non fat milk solids. Then slowly add in the eggs, allowing them to incorporate before adding more. Next, add in the water. In a separate bowl, combine the yeast ad flours. Then add in the flour to form a dough. You can add a little more cake flour if dough is too loose. Switch to a dough hook and knead for 4 minutes.
  2. The dough will need to ferment for 1.5 to 2 hours at 75F. Be sure to cover it so it doesn’t dry out. While the dough is fermenting, make the glaze. Cream together all ingredients using a paddle in an electric mixer. Spread the glaze onto the bottom of a pan with tall sides (and sprinkle with pecans if using), such as a roasting pan, and cover.
  3. Once the dough is done fermenting, transfer it to a floured surface. Fold the dough 2-3 times. Then roll out into a rectangle. Sprinkle with cinnamon and sugar. Roll dough into log and cut into 8 even pieces. Place the rolls into the pan, resting on top of the glaze. Cover and let proof for 30-45 minutes.
  4. Bake at 375 for 30-35 minutes. Glaze will be bubbly and buns will be browned.
  5. Let cool for 5-10 minutes and then turn pan over onto parchment paper.

Sunday, June 24, 2012

Sugar-Vanilla Clouds, aka Marshmallows


You have officially been warned. No store bought marshmallow can ever compare to these homemade marshmallows. They are ultra fluffy and light; you might as well be eating a cloud of sugar and vanilla! They will give your hot cocoa a special touch or just eat them alone (my husband does!). They even toast up nicely over a campfire and will make the most ooey-gooey s'more ever.


Ingredients:

  • 3 packages unflavored gelatin
  • 1 cup ice-cold water, divided
  • 1 1/2 cups granulated sugar
  • 1 cup light corn syrup
  • 1/4 teaspoon salt
  • 1 teaspoon vanilla extract
  • 1/4 cup powdered sugar
  • 1/4 cup corn starch
  • non-stick spray
  1. Place the gelatin into the bowl of a stand mixer along with 1/2 cup of the ice-cold water. Have the whisk attachment standing by. 
  2. In a saucepan combine the remaining 1/2 cup ice-cold water, granulated sugar, corn syrup, and salt. Place over medium high heat, cover, and allow to cook for 3-4 minutes. Uncover, clip a candy thermometer onto the side of the pan, and continue to cook until the mixture reaches 240F, about 7-8 minutes. Remove from the heat. 
  3. Turn on the mixer to medium-low speed, and while running, slowly pour the sugar syrup down the side of the bowl into the gelatin mixture. Then turn mixer to high speed and continue to whip until the mixture become thick and is luke-warm, about 12-15 minutes. Add the vanilla during the last minute of whipping. 
  4. Prepare the pan while the marshmallow is whipping. Combine the powdered sugar and corn starch in a small bowl. Pour this mixture into a 9x13 pan and toss around to coat evenly. Return the remaining mixture to the bowl for use later.
  5. Once the marshmallow is done whipping pour it into the prepared pan, using a lightly oiled spatula for spreading evenly into the pan. Dust the top with the cornstarch mixture and reserve the rest for later. Allow the marshmallows to sit, uncovered, for 4 hours. 
  6. Turn the marshmallows out onto a cutting board and cut into 1-inch squares using a pizza wheel dusted with the cornstarch mixture. Once cut, lightly dust all side of each marshmallow with the remaining cornstarch mixture. 
  7. These are ready to serve, or store in an airtight container for up to 3 weeks.

Saturday, April 7, 2012

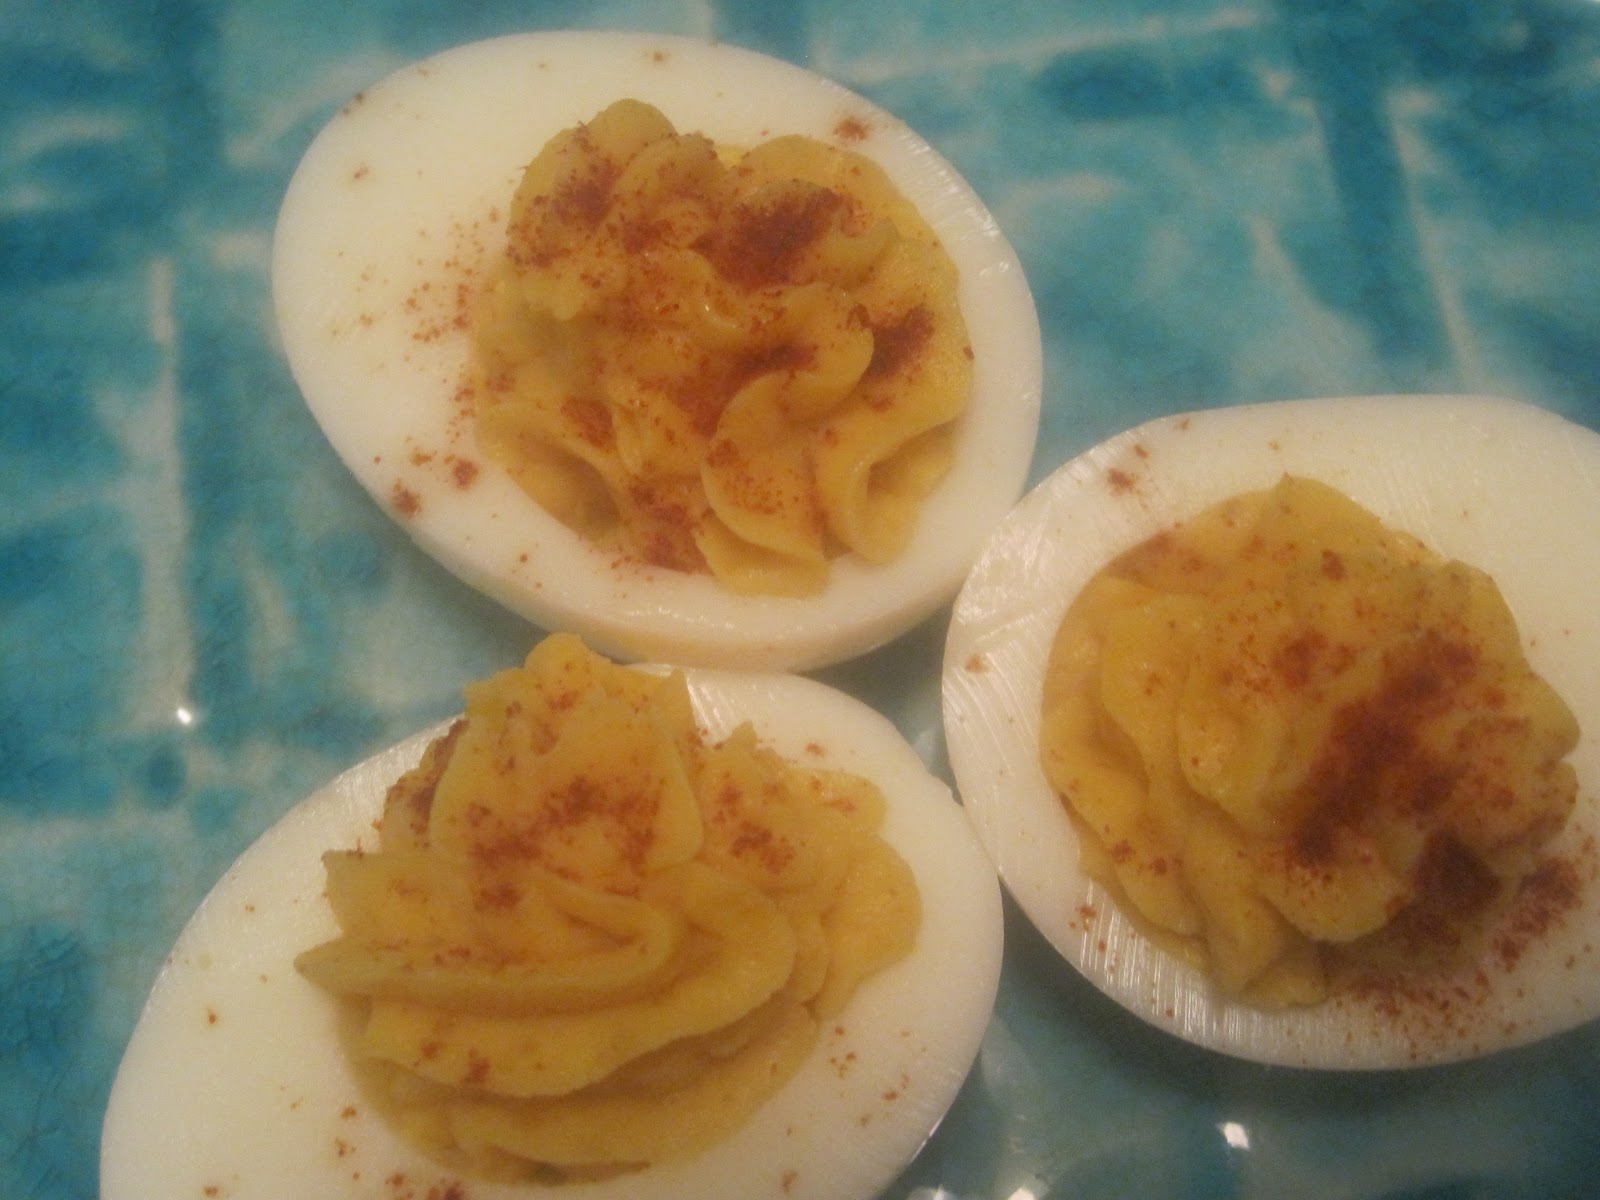
Your Basic Deviled Egg


Deviled eggs is the food I look forward to the most at Easter time. This year my husband and I decided to stay home rather than visiting the family, but I won't go without the deviled eggs. The great thing is that you can make as many or as few as you like. If your making them for a large group you may want to make a couple dozen, but if you're making them just for yourself (as I'm doing this year) then you can make just a couple.

This is a super-basic deviled egg because it's the only kind I like. I hate when sweet relish is added or any other "creative ingredients" for that matter. But when you have such a basic recipe it has to be spot on. These actually earned me an A on a final in culinary school last year. First, you want to make sure you don't use really fresh eggs. As an egg ages, it starts to pull away from that membrane between the egg and shell, making it easier to peel once the egg is cooked. Second, you want to make sure you cook the eggs properly. Nobody likes rubbery egg whites or green yolks from overcooking.

How to make a proper hard-boiled egg.

  1. Bring eggs to room temperature by leaving them out for about an hour. 
  2. Place eggs in a pot and over them with tap water. 
  3. Place over high heat and bring to a boil. 
  4. Let boil for just 1 minute (no longer) and then turn off the heat. 
  5. Set a timer for 12 minutes. 
  6. At the end of 12 minutes, remove the eggs from the hot water and place in a cold water bath to stop the cooking process.
Your egg should look like this. The whites will be soft and the yolks yellow. 


How to make deviled eggs.
Ingredients:
  • 6 hard boiled eggs
  • 1/4 cup mayo
  • 1 tablespoon Dijon mustard
  • pinch of salt
  • pinch of cayenne pepper
  • paprika, for garnish
  1. Peel eggs and cut in half length-wise. Remove the yolks and place them in a bowl. Set the whites aside. 
  2. To yolks, add mayo, Dijon, salt, and cayenne pepper. Add more salt to taste. 
  3. Put the yolk mixture into a piping bag with tip. If you don't have a piping bag, just use a zip lock bag with a corner cut off. Pipe the mixture in the egg whites. 
  4. Sprinkle lightly with paprika. Refrigerate and serve once fully chilled. 

Wednesday, April 4, 2012

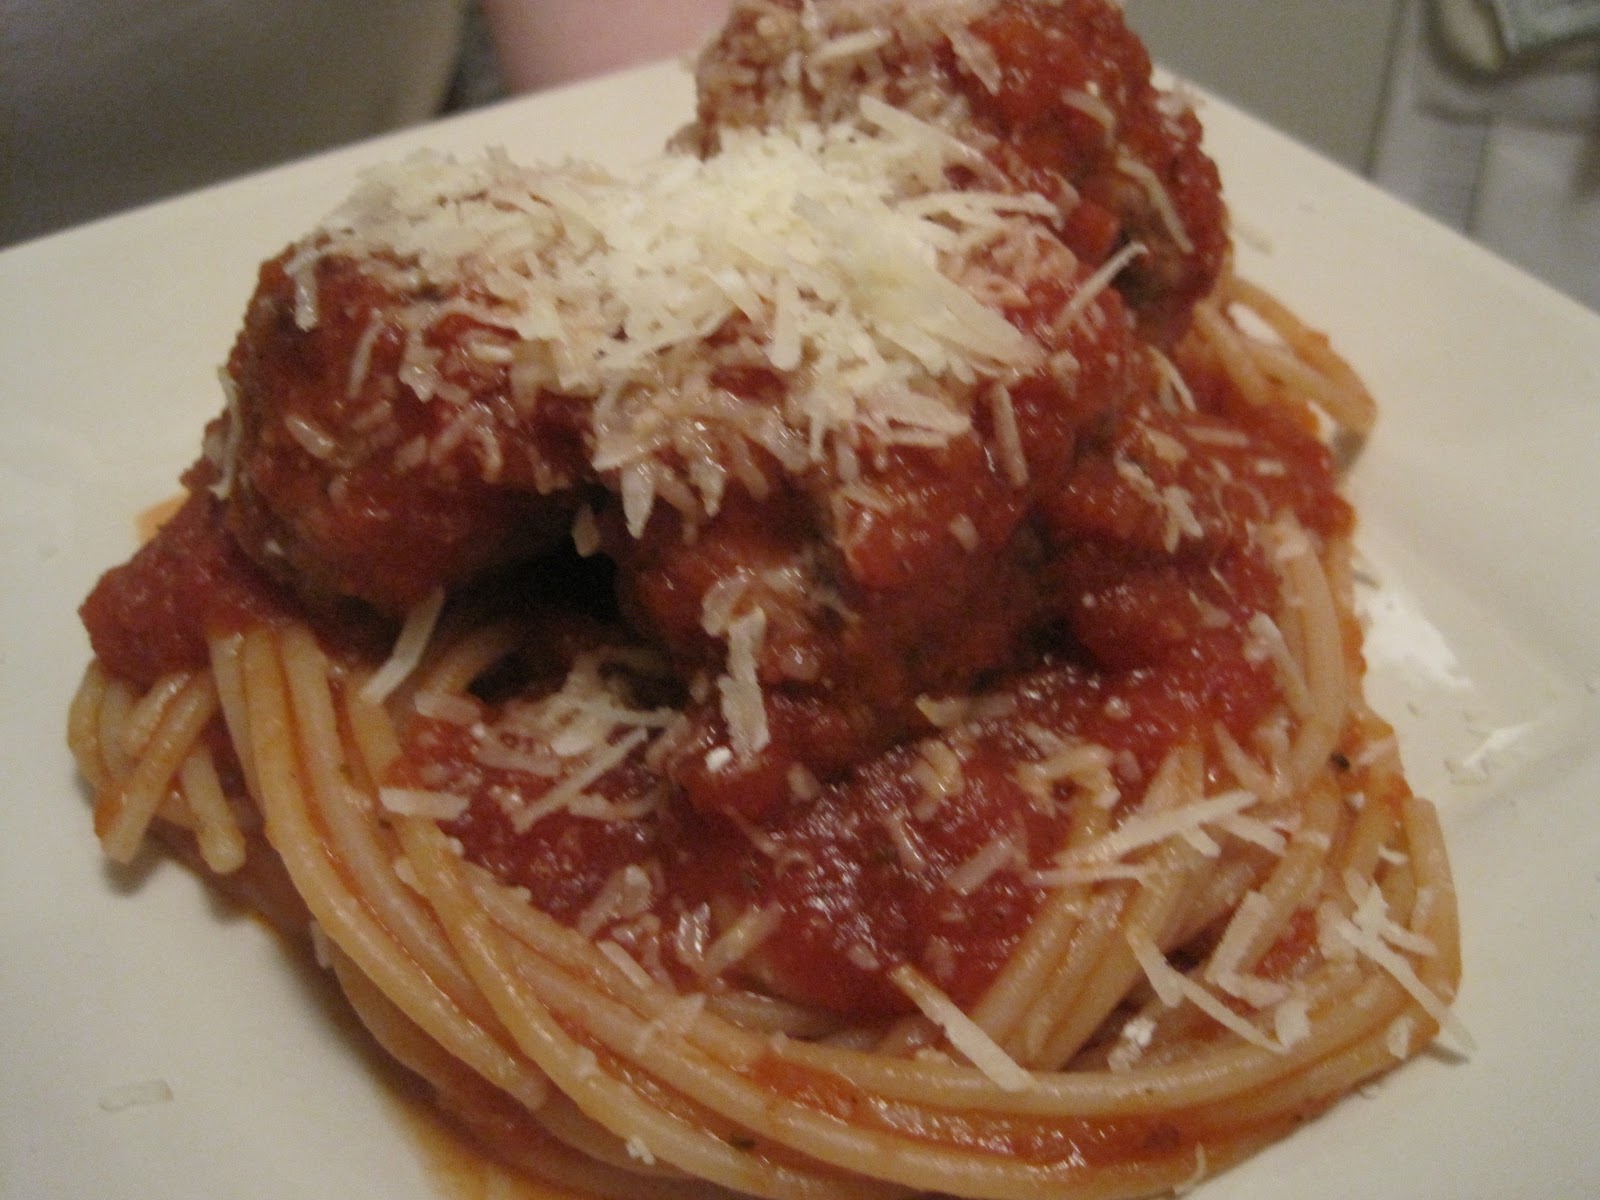
Mmmm... Meatballs and Spaghetti

Italians eat spaghetti. Italians eat meatballs. Italian do not, however, eat spaghetti and meatballs. That is an American invention and a splendid one at that.


My husband, Jimmy, and I had lunch at an Italian restaurant one day where Jimmy ordered their famous giant meatball (yes, just one as this thing was the size of a softball) with spaghetti. His meatball was bland and crumbly. I promised him that I would make him the best meatball he's ever had. And I did. Combining ground beef, pork, and pancetta, packs a huge punch of flavor. My meatballs are rich, moist, and far from bland. This recipe makes a lot of meatballs and is great for entertaining a large crowd. I love making meatball subs with the leftovers too!

Meatballs Ingredients:
  • 1 1/2 cups Panko bread crumbs
  • 1 cup milk
  • 2 eggs
  • 1 lb lean ground beef
  • 1 lb lean ground pork
  • 6 oz pancetta, finely chopped
  • 2 cloves garlic, smashed into a paste
  • 1 cup grated Parmesan cheese
  • 1/4 cup minced fresh Italian parsley
  • 1 teaspoon powdered gelatin, dissolved in 2 tablespoons cold water
  • 1 teaspoon salt
  • 1/2 teaspoon pepper
Sauce Ingredients:
  • 2 tablespoons olive oil
  • 1 onion, finely chopped
  • 4 cloves garlic, minced
  • 1/2 teaspoon red pepper flakes
  • 1 teaspoon dried oregano
  • 2 cups red wine
  • 2-28 oz cans San Marzano tomatoes, with juice
  • 1-6 oz can tomato paste
  • salt and pepper, to taste
  • sugar, to taste
  • grated Parmesan, for serving
  • 2 lbs spaghetti
  1. Start by making meatballs. Preheat oven to 400F and spray 2 baking sheets with non-stick spray or olive oil. 
  2. In a large bowl, mix together the Panko and milk, letting it sit for a few minutes and mash with a fork against the side of the bowl. Then add all the rest of the ingredients and fold everything together. 
  3. Roll into meatballs about the size of a golf ball and place on the baking sheets. This will give you about 30-40 balls. Place in oven and set timer for 25 minutes. When meatballs are done, remove from the oven and reduce heat to 300F. 
  4. While meatballs are cooking, start on the sauce. In (very) large pot, heat olive oil over medium heat and saute the onions  with a couple pinches of salt until translucent. Add the garlic, red pepper flakes, and oregano, and cook for 2-3 minutes more.
  5. Pour in the wine, tomatoes, and tomato paste, and bring to a boil. Reduce to a simmer and cook for 10 minutes. Use an immersion blender to puree the sauce. Simmer for another 10 minutes. 
  6. Adjust taste using salt, pepper and sugar. Use a teaspoon of sugar at a time- this will deepen the flavor, but don't use too much. You can also add more oregano right now if you'd like. 
  7. Place the meatballs into the sauce and try to get them mostly covered with sauce. Cover pot with foil and place in the oven for 1 hour. 
  8. In separate pot, cook the spaghetti according to the package directions minus 1 minute. Drain the spaghetti and return to the pot. Stir in a little sauce from the meatballs. 
  9. To serve, place spaghetti on a plate and then top with 2-3 meatballs plus more sauce and a sprinkle of Parmesan. 

Saturday, January 7, 2012

Salted Caramel Ice Cream


I'm not really into sweets, but when it's ice cream I have little self control. I can and will eat a pint of ice cream in one sitting. So you can imagine my delight (and my fear) when I received an ice cream maker for Christmas. I had been holding onto a special ice cream recipe as I knew the day would eventually come when I could use it: salted caramel ice cream from non other than Rori herself.

Rori's Artisanal Creamy is located in my hometown of Santa Barbara. Their ingredients are organic, local, and super fresh, sourcing their dairy from Marin county, fruit from the farmer's market, and fair-trade chocolate from San Louis Obispo. Their commitment to quality is evidence when you taste their ice cream. I was watching the Barefoot Contessa on Food Network one Saturday morning when Rori made a guest appearance and shared her recipe for her salted caramel ice cream. This stuff is perfectly sweet and salty, and deliciously creamy.

You can also use this ice cream base recipe and add in all kinds of flavors. I made a sinfully rich dark chocolate ice cream by melting 7 oz of high quality dark chocolate and blending in 3/4 cup of heavy cream. Then I added that to the ice cream base with 1 tablespoon of vanilla. Delish!

Ice Cream Base:

  • 1 cup whole milk
  • 4 large egg yolks
  • 3/4 cup sugar
  • 2 cups heavy cream
  1. Heat the milk in a sauce pan over medium-low heat.
  2. Prepare an ice bath by setting a 2 quart bowl over a larger bowl partially filled with ice water. Set a strainer over the smaller bowl and set aside.
  3. In a separate bowl, whisk together the egg yolks and sugar until pale yellow in a color and the sugar has dissolved. Gradually pour in the warmed milk into the yolk mixture, whisking constantly. Pour the mixture back into the same saucepan you used to warm the milk. Cook for 3-5 minutes, stirring constantly, until the custard thickens and coats the back of a wooden spoon.
  4. Strain the custard into the top bowl of the ice bath to stop the cooking process. Add the heavy cream and stir over the ice bath until cool. Cover the bowl with plastic wrap and chill thoroughly.
Caramel Sauce:
  • 1 1/4 cups sugar
  • 3/4 cup heavy cream
  • 2 teaspoons flaky sea salt, such as Maldon
  • 1 tablespoon pure Tahitian vanilla extract
  1. Heat the sugar in a dry heavy-bottom sauce pan over medium heat, stirring with a fork to heat the sugar evenly, until it starts to melt. Then stop stirring and swirl the pan so the sugar melts evenly, and continue cooking until it is a dark amber color. 
  2. Carefully add the heavy cream (the mixture will splatter) and cook, stirring until all the caramel has dissolved. Transfer to a heat-proof bowl and stir in the sea salt. (Personal note: I use 1 1/2 teaspoons salt as I like it more salty)
  3. Set the caramel mixture over a bowl filled with ice water and stir until chilled to room temperature. Combine the caramel mixture with the ice cream base and add the vanilla. 
Lastly, place the finished ice cream batter into an ice cream maker and finish using manufacturer's directions. 

Monday, December 5, 2011

Meatloaf and Mashed Potato Cupcakes

You are probably thinking that the words "meatloaf" and "cupcakes" should not be used in the same sentence, let alone in the same recipe title. Have no fear, these are just mini-meatloaves topped with mashed potatoes. They just look like cupcakes.


You can use your own recipes for meatloaf and mashed potatoes, but I'll provide basic ones as well. Simply bake the meatloaf in a cupcake pan. For an extra surprise, inject some ketchup or BBQ sauce into the center of the meatloaf using a small piping tip before baking them. Once slightly cooled, top your meatloaf cupcakes with mashed potato frosting using a large piping tip, an ice cream scoop, or a spatula.

Basic Meatloaf Ingredients:
  • 1/2 onion, chopped small
  • 1 red bell pepper, chopped small
  • 1/2 tablespoon cooking oil
  • 1 lb lean ground beef
  • 1 egg
  • 1 cup panko bread crumbs
  • 1 tablespoon salt
  • 1/2 tablespoon pepper
  1. Saute the onion and pepper in cooking oil until soft. Allow to cool. 
  2. Mix together sauteed vegetables, ground beef, egg, panko, salt, and pepper, being careful to not over-mix.
  3. Place meat mixture into cupcake tins and bake at 350 for 30 minutes or until the meatloaves reach 165 degrees. 
  4. Remove from cupcake tin and place on paper towels to absorb excess fat.
Basic Mashed Potato Ingredients:
  • 5 medium yellow or red potatoes, peeled and quartered
  • 1/2 cup heavy cream
  • 2 tablespoons butter
  • salt and pepper to taste
  1. Boil potatoes in salted water until fork tender.
  2. Put potatoes through a ricer for perfectly smooth consistency. 
  3. Mix in cream, butter, and salt and pepper to taste.

Friday, November 25, 2011

Oreo Stuffed Chocolate Chip Cookies

Oh. Em. Gee. You better have a serious sweet tooth to attempt these cookie gut-bombs. I love Oreos and I loved home made chocolate chip cookies, but these are more than just the sum of it's parts. Fresh out of the oven, the Oreo's center is warm and gooey. Be sure to have plenty of milk on hand when you serve these up.


Ingredients

  • 24 Double Stuf Oreo cookies
  • 1 batch of your favorite cookie dough (I just follow the Nestle's Toll House recipe, leaving out the nuts for this recipe)
  1. Preheat oven to 350F.
  2. Wrap each Oreo in a small layer of cookie dough. Make the layer as thin as you can. If it's too thick, it will spread out too much. 
  3. Bake for 12 minutes or until slightly golden. 

Not Just for Thanksgiving Turkey and Stuffing

Both my family and my husband's family live 300+ miles away and this year we were unable to make the long drive to see them. We still wanted traditional Thanksgiving turkey feast, but without all the big fuss of a whole bird. First, start with your favorite stuffing and spread it across a baking dish. Top it with some turkey cutlets, brushed with sage and butter, and bake. Downside to not cooking a whole turkey is not having the drippings to make a delicious gravy. Just buy some turkey stock, add to a roux with some sage, and, voila, you've got gravy - problem solved. This dish is so easy, I make it all year round.


Ingredients:
  • 1 batch of your favorite stuffing - or use my recipe below
  • 5-6 turkey cutlets
  • 1 tablespoon butter
  • 1 tablespoon vegetable oil
  • 1 teaspoon salt
  • 1/2 tablespoon dried, ground sage
  • Gravy - recipe below
  1. Spread stuffing into a 9x13 baking dish.
  2. Melt butter. Add in the vegetable oil, salt, and sage, and whisk together. Brush onto both sides of the chicken cutlets. 
  3. Place chicken cutlets over the top of the stuffing. 
  4. Cover and bake for 20 minutes at 350. Remove cover, and bake 10 minutes. Flip over turkey cutlets and bake another 10 minutes. Turkey and stuffing should both reach a temp of 165F. 
Stuffing Ingredients:
  • 2 tablespoons butter
  • 1 onion, chopped
  • 1 apple, peeled/cored and chopped
  • salt and pepper
  • 1 tablespoon dried, ground sage
  • 6 cups croutons - dice any kind of bread and toast in oven until dried out
  • 1/2 cup almond slivers
  • 2 cups + turkey stock
  1. Saute the onion and apple in the butter with some salt and pepper, and the sage. 
  2. Add croutons and almond slivers, and mix together.
  3. Slowly add in turkey stock and mix well. I like my stuffing moist like it came out of the bird, so I use extra stock. Use more or less, depending on your preference. 
Easy Turkey Gravy Ingredients:
  • 2 tablespoons butter
  • 2 tablespoons flour
  • 1 tablespoon dried, ground sage
  • 2 cups turkey stock
  • salt and pepper to taste
  1. Over medium heat, melt butter. 
  2. Add sage and flour and cook for 2-3 minutes, stirring with a whisk. 
  3. Slowly add in turkey stock, whisking continuously. Increase heat and bring to a simmer. Gravy should be thickened by now.
  4. Reduce heat and season to taste with salt and pepper.

Wednesday, November 23, 2011

Key Lime Pie


Key lime pie is, hands down, my most favorite food. I just love that it's tangy, but sweet, fresh, and creamy. 'Nuff said. 


Key limes, originally from Malaysia, were brought to Florida by the Spanish in the 1500s. They are smaller than a golf ball, pale yellow-green in color, and are more acidic than regular limes. The first known key lime pie was made in the late 1800s, by Aunt Sally, a cook for William Curry, who was Florida's first self-made millionaire. However, many people say that Aunt Sally just perfected the popular delicacy of the area.

Aficionados will argue over the proper way to make a key lime pie. Graham-cracker or pastry crust? Meringue on top or whipped cream, or neither? Cooked or uncooked filling? Personally, I like a graham-cracker crust and whipped cream. A chemical reaction occurs between the lime juice and the condensed milk so there is no need to cook it, but most people chose to because of the raw egg and because it helps the filling set more firmly. The one thing that everyone does agrees on, is that under no circumstances should you ever add green food coloring. The filling of authentic key lime pie is a light yellow.

My key lime pie consists of 3 parts: graham-cracker crust, filling, and whipped cream.
  • Graham-cracker crust: In a food processor, blend together 1 package of crushed graham-crackers, 5 tablespoons of melted butter, and 1/4 cup sugar. Press the mixture into a pie tin and bake at 350 for 8 minutes.
  • Filling: Using electric mixer on high-speed, whip 3 egg yolks and the zest of 3 key limes for about 5 minutes. Slowly add in 1 14 oz can of sweetened condensed milk and 1 tablespoon of vanilla extract (the vanilla is my secret ingredient). Turn speed to low and slowly add in 1/2 of key lime juice, but don't over mix at this point. Taste and if it's too tart, add some sugar, or if it's too sweet, add more key lime juice (I like it tart so I added more lime).
  • Pour the filling into the pie crust and bake for 10 minutes at 350. Let cool and then place in fridge for at least 2 hours before serving.
  • Garnish with fresh whipped cream (made from 1 cup whipping cream and 1/3 cup powdered sugar) and some lime zest.

Sunday, November 13, 2011

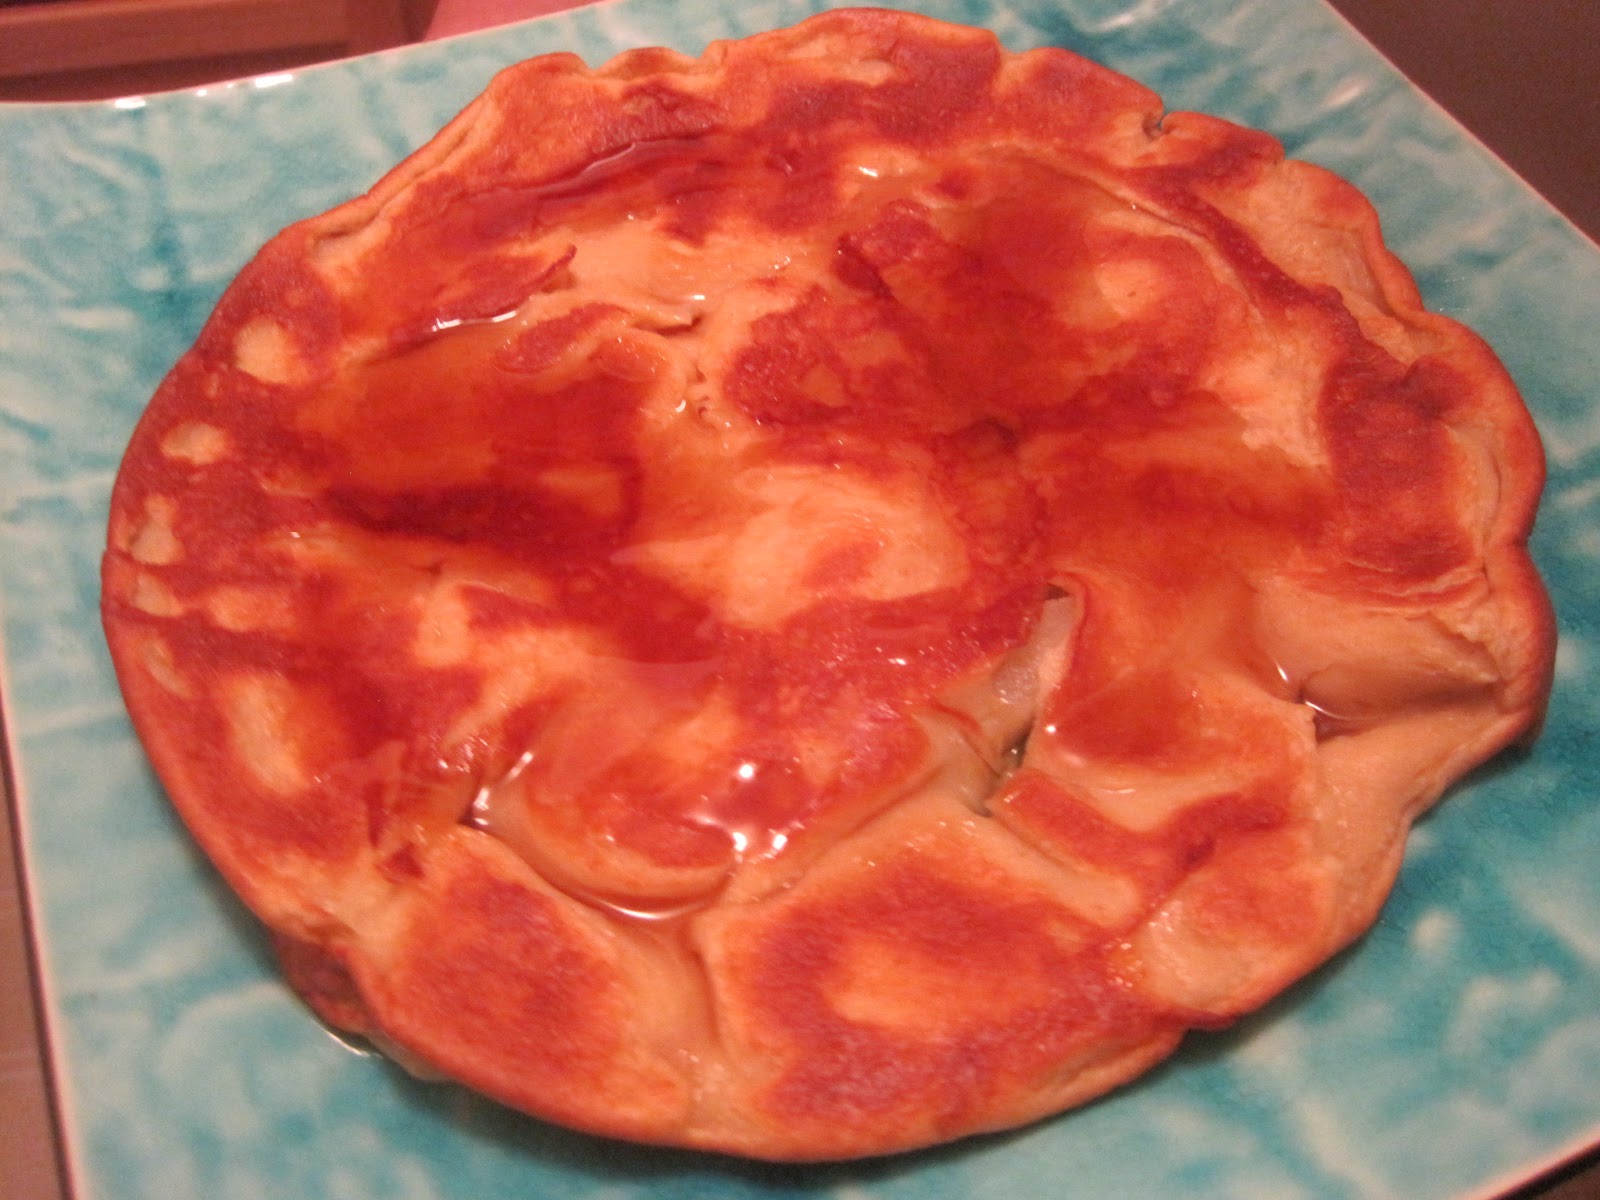
Baked Pear Pancakes


This oven-baked pear pancake transports me back to Amsterdam. I had gone for bicycle ride out to the countryside and stopped at a cute little restaurant where I enjoyed a pancake similar to this one on their garden patio. Although I love American pancakes (especially with blueberries!), these European style pancakes are a special treat. Make this for your significant other on a weekend morning for a romantic breakfast in bed!


Ingredients:
  • 3/4 cup flour
  • 1/2 teaspoon salt
  • 1/4 teaspoon cinnamon
  • 3 tablespoon sugar
  • 2 eggs
  • 1 cup milk
  • 3 tablespoons butter, melted
  • 1 teaspoon vanilla
  • 1 pear, peeled and cut into bite-size pieces
  • non-stick spray
  1. Preheat oven to 400. Spray 2 9-inch round pans with non-stick coating.
  2. Whisk all ingredients (except the pear) together. Mix in the pear.
  3.  Pour evenly into the 2 pans, spreading out the pears. 
  4. Bake for 15 minutes. Reduce heat to 325 and cook for another 10 minutes. 

Tuesday, October 11, 2011

Date with a Pig


A couple of years ago my mom came to town for a weekend visit and we ate dinner at Milk and Honey, a tapas restaurant in downtown Santa Barbara. After two different friends highly recommended we order the "Date with a Pig" we, of course, could not resist. Simply, a date wrapped in bacon and drizzled with honey, it was amazingly delicious. We even ordered a second helping after devouring the first dish that came out. 


Could I recreate the Date with a Pig at home? After much experimentation I have concluded that they must deep fry their bacon wrapped dates; I just couldn't get it exactly right in an oven no matter what I tried. However, my version is pretty darn good and I love bringing these little babies to parties. 

Ingredients:
  • 10 dates, cut in half lengthwise with the pits removed
  • 10 strips of thick cut bacon, cut in half to make 20 short pieces
  • salt
  • honey
  • 20 toothpicks, soaked in water for 20 minutes
  1. Wrap each date with a piece of bacon and secure with a toothpick. 
  2. Place on a sheet pan and sprinkle with salt.
  3. Cook for 20 minutes at 350. Turn over and cook for another 10-20 minutes, or until bacon is crispy. 
  4. Allow to cool slightly and serve drizzled lightly with honey. 


Sunday, October 9, 2011

Not-So-French Dip


A French dip is a simple sandwich of thinly sliced roast beef on a baguette or french roll that is dipped in beef "jus." It's origins are not French at all, but has it's roots in Los Angeles, California. According to Philippe of Philippe's restaurant, a policeman eating a roast beef sandwich "saw some gravy in the bottom of a large pan of roast meat. He asked me if I would mind dipping one side of the French roll in that gravy. I did, and right away five or six others wanted the same." And so was born the beef dip sandwich. Philippe's was affectionately called Frenchy's and so the beef dip soon became known as the French dip.


I like to braise tri-tip for my French dip sandwiches. If you aren't from California then you might not be familiar with this cut, but you can ask your butcher for part of the triangle muscle from the bottom sirloin. It is a lean muscle so there is usually a cap of fat attached to the tri-tip. I remove this as braising will keep the meat moist enough.

Ingredients:

  • approx 1.5 lb tri-tip with fat cap removed
  • salt and pepper
  • 1 tablespoon olive oil
  • 4 cups beef stock
  • 6 crusty French rolls
  • horseradish, optional
  1. Preheat oven to 350.
  2. Rub tri-tip with salt and pepper. 
  3. Sear both sides of the tri-tip in olive oil over high heat in large pan. 
  4. Pour beef stock over tri-tip, deglazing the pan and scrapping up the caramelized bits from the bottom of the pan. Place pan in oven, uncovered. Cook for approx 45 minutes or until meat is cooked to 145 degrees, turning half way through. For well done, cook to 155 degrees. 
  5. Remove tri-tip from jus and allow to rest for 10 minutes. Set jus aside and toast bread while waiting for meat to rest. 
  6. Thinly slice tri-tip and place in toasted bread, served with jus on the side. For a little kick, serve with horseradish. 

Wednesday, September 21, 2011

The Food Truck Craze

Unless you've been living under a rock, you know that food trucks are all the rage. No longer referred to as "roach coaches," these trucks even reach gourmet status. What's the big deal with these trucks anyway? Well, the obvious is that they come to you. They are there when you drunkenly stumble out of the club downtown or are parked in front of your office building on your lunch break. In my opinion the best thing about food trucks is that you, potentially, get superb food at a low price. With lower overhead costs than a restaurant they can afford to give you gourmet food for much cheaper.

Just this year food trucks have started popping up in Santa Barbara and I couldn't be happier. Next time you are here, be sure to hit up these guys; you'll often find them parked along the beach or off of State Street. And tell them Dina sent you.

The Burger Bus


The Burger Bus has actually been around for a couple years. They serve- you guessed it- burgers. But they also make the best pickle chips I've ever had. If you've never had pickle chips, they are simply dill pickle slices in a beer batter and deep fried, and they are amazing! Their onion "rings" are pretty darn good too. What I really love about The Burger Bus is their commitment to high quality local ingredients. Everything is local; the meat, cheese, bread, spreads, and produce. Their signature burger is known as the "CB&J" which is short for cheeseburger and jelly. Jelly on a burger isn't as crazy as it sounds once you've tried one.

The O Street Truck


The O Street Truck prides itself on it's French-Mex-Vietnamese fusion cuisine. They frequently feature new, seasonal items on their menu, but they always sell banh mi style sandwiches and tacos. For only $5, the banh mi sandwiches come on a 6 inch baguette with your choice of marinated chicken or steak, or BBQ pulled pork (my favorite), carrots, cucumbers, cilantro, and their spicy "cha cha" sauce. Occasionally, I'll splurge on one of their french pastry pizzas which aren't really pizzas, but are sinfully delicious.

THAI on a Truck
When I went to Thailand I tasted some of the best food I've ever had. The problem was coming back to the United States and finding that all Thai food failed in comparison to the real thing. Well, these guys at THAI on a Truck are the real deal and never leave me disappointed. They go all the way to LA to find specialty ingredients to make their food as authentic as possible. Their Panang curry is, hands down, my favorite dish, but everything is delicious. They offer a few main dishes and usually a daily special, a variety of small bites, and a not-too-sweet Thai iced tea.

Road Dogs


The newest mobile cuisine in town is the Road Dogs, a mobile gourmet hot dog cart. I can't express to you how happy my husband was when these guys opened up. These aren't just any wieners, but are Hoffy, and if you're a hot dog connoisseur that means something. Long and thin, and with a great snap, you won't be disappointed. You can get anything from a plain, no-fuss dog to dogs loaded with all kinds of homemade toppings. My favorite is the Sweet Baby Ray which comes topped with BBQ sauce, crunchy bacon, and fried onions.

Saturday, September 17, 2011

Italian Sausage Hero


This is more of a non-recipe, but it was so easy and delicious that I wanted to share it. Plus I learned something while trying to figure out what to call my sandwich. I was pretty impressed to find how serious people take their sandwiches on the east coast. They have so many names- grinder, sub, blimpie, hoagie, zep, po' boy, and the list goes on- while we just call them all "sandwiches" here on the west coast. I finally decided to call my sandwich a "hero" which implies it is served on a roll and has Italian flavors. In case you are wondering, the name has no relation to the Greek gyro.

I took a classic Italian combination of sausage, peppers, and onions, and stuffed it into a toasted roll. Squirt a little bit of spicy mustard on there and that is all you need for this flavorful Italian sausage hero. The sausage is the star of this dish so be sure to buy some nice Italian style ones. Or if you are feeling adventurous, make your own!

Ingredients:

  • 1/2 onion, cut into bite size chunks
  • 1 bell pepper, cut into bit size chunks
  • 4 Italian sausages
  • 1/2 tablespoon olive oil
  • 1/2 teaspoon salt
  • dash red pepper flakes
  • 4 hero rolls, sliced and toasted
  • spicy mustard
  1. Heat olive oil in large skillet and cook sausages- you want them to get dark and crispy on the outside so you some medium-high heat. Split the sausages in half lengthwise and put back in the skillet cut side down and get that nice and crispy too. Remove from pan.
  2. Reduce heat to medium and place onions and peppers in pan. Sprinkle with salt and cook until soft, stirring occasionally, until softened. 
  3. Cut sausage into bite size chunks and toss into onion and pepper mixture. Add red pepper flakes and just cook a minute, enough to reheat the sausage.
  4. Pull some of the stuffing from the middle of the toasted rolls so your filling has a nice pocket to go and won't spill out the sides. Stuff your heros and top with mustard if desired. 

Wednesday, September 14, 2011

The Perfect Pizza Pie


The dough is what makes a pizza good. It needs to have flavor, the perfect chew, and be crispy too..The main problem I used to have with making  pizza dough is keeping it thin. I'd roll out the dough and it would spring back on me. You need to use a high protein flour (bread flour rather than all purpose) to get a good chewiness to the crust, but too much gluten development and the crust will be tough and the dough will be too springy to roll out properly even after letting the dough relax.

I've got 2 secrets. First, use "00" flour. You can find this at specialty stores (I found it at a local Italian grocer) or buy it on the Internet. This flour has a lot of protein, but is highly refined and powdery. It really is worth the effort of getting the special flour. The second secret is letting the dough ferment in the refrigerator overnight rather than on the counter for a few hours. The cold slows fermentation so it has to be allowed a full day in the fridge (but don't let it go longer than 72 hours). The cold prohibits gluten development though. The benefits of this is full flavor will less stretch. The dough actually rolls out easily and doesn't spring back at all. The final result is a crispy, thin, and slightly chewy crust.

Top your pizza with whatever your heart desires. I like to keep mine simple with a little bit of tomato sauce, basil, vegan mozzarella, and a sprinkle of nutritional yeast. Sometimes I really like a pesto sauce with a ton of vegetables too. Cooking on a pizza stone is ideal, but if you don't have one, bake it on a cookie sheet until it's firm and then transfer directly to the oven rack so the bottom can crisp up.

Ingredients:
  • 3 cups "00" flour (16 1/2 oz)
  • 2 teaspoons sugar
  • 1/2 teaspoon instant or rapid-rise yeast
  • 1 1/3 cups cold water
  • 1 tablespoon light olive oil
  • 1 1/2 table salt

  1. In standing mixer with paddle attachment, combine flour, sugar, and yeast. Over low speed, slowly add in water- you may not need all of it- until dough forms into a ball and pulls away from the sides of the bowl. Switch to a dough hook attachment and mix for a couple of minutes, until dough is smooth. Allow to sit for 10 minutes (this allows the flour to hydrate).
  2. With the dough hook still attached, turn mixer onto low speed. drizzle in olive oil and add salt. Knead dough by letting mixer run at medium-low speed for 5 minutes. 
  3. Form dough into tight ball, place in lightly oiled bowl, and tightly cover with plastic wrap. Place in refrigerator for at least 24 hours, but no more than 72 hours. 
  4. Remove dough from fridge and, using a knife, cut into 2 even pieces to make 2 large pizzas or 4 even pieces to make 4 smaller (individual size) pizzas. Note that the dough is pretty tough and this is okay. As it warms to room temp, it will soften and relax. On lightly floured surface, form pieces into round smooth balls and allow to sit, covered, for 1 hour. 
  5. Preheat oven (and a pizza stone if you have one) to 500F with rack placed at the top of oven. 
  6. On lightly floured surface, squash a ball of dough into a flat disk and roll out thin. Place on pizza stone or baking sheet, and add pizza toppings. 
  7. Bake for 8-12 minutes, depending on size of pizza, or until crust is nicely browned. Place pizza on wire rack to cool for 5 minutes before serving. 


Sunday, September 11, 2011

Apple-Cheddar-Squash Soup


I love when a dish screams the season of its ingredients. This soup is all about the fall with it's apples and butternut squash, and I especially enjoy it during cold, wet weather. Apples, cheddar, and butternut squash may seem like an odd combination, but it works and does so amazingly well. This soup is savory, but has a hint of sweetness and is bright in flavor. Served with some crispy prosciutto (Italian bacon), it goes great as a brunch dish too.

If you aren't familiar with prepping butternut squash, it is important to know that it can cause "contact dermatitis" for many people. This is a minor skin allergy caused from contact with the flesh of the squash. If you experience this, just apply Cortisone cream and it should clear up in a day or so. If you have sensitive skin, you may just want to take the precaution of wearing latex gloves. Many places sell butternut squash already cut into small squares, but you'll pay a lot less if you buy a whole one and prep it yourself.

Ingredients:
  • 3 tablespoons butter
  • 4 cups butternut squash, peeled and cut into small cubes
  • 1 russet potato, peeled and cut into small cubes
  • 3 medium apples (any kind, but nothing too tart, i.e. no Granny Smith), peeled, cored, and cut into small cubes
  • 1/4 cup flour
  • 4 cups chicken stock
  • 1 cup water
  • 8 oz sharp white cheddar cheese, grated
  • 1 cup milk
  • salt and pepper, to taste
  • 3 oz prosciutto, sliced thin
  1. First cook the prosciutto. You can fry it up like bacon on the stove top, but you will need to add a little bit of butter to the pan first. What I like to do is bake it though. Place on wire rack over a sheet pan and bake at 400 until crisp. Set prosciutto aside. 
  2. Heat butter in large soup pot. Add squash, potato, and apples and saute until everything starts to soften. 
  3. Reduce heat to medium-low and add flour, stirring well. Cook for 3 minutes. 
  4. Add chicken stock and water. Liquid should just cover the the veg. Increase heat and bring to a boil. 
  5. Reduce heat back down to a low simmer and cook until squash and potato is fully cooked. 
  6. Puree soup using an immersion (stick) blender. Add cheese and milk and stir well. 
  7. Salt and pepper to taste. Serve in bowls garnished with crispy prosciutto. 

Wednesday, September 7, 2011

Southern Dumplings with Chicken

The combination of chicken and dumplings is universal (wonton soup, matzo ball soup, spatzle, tortellini, etc.), but nobody does it like they do in the southern United States. It became popular during the Great Depression because it was cheap and filling, but it's now a typical comfort food especially in the South. My husband has some Southern heritage so on holidays his family would serve dumplings in a blond gravy along side the turkey or ham. I had originally developed this recipe for him, but I love it as much as he does.


My recipe for Southern style dumplings with chicken is in a gravy-like broth so it is rich. I flavor it with a simple mirepoix (onion, carrot, and celery) and add lots of ground pepper. I use boneless, skinless chicken breasts and brine it to keep it super moist. I cheat a little bit by buying refrigerated biscuits (like Grands) for the dumplings which is a nice short cut and I don't miss the homemade dumplings much.

Ingredients:
  • 1 lb chicken breasts (boneless and skinless)
  • 1 quart cold water
  • 1/4 cup table salt
  • 1 tablespoon canola oil
  • 1/8 cup sugar
  • 2 tablespoons butter
  • 1 cup onion, chopped
  • 1/2 cup carrot, chopped
  • 1/2 cup celery, chopped
  • 1/4 cup flour
  • 4 cups chicken stock
  • 1/2 package refrigerated biscuits
  • 1 cup milk
  • salt and pepper, to taste
  1. First get your chicken in the brine. Add the salt and sugar to the water and mix. Place the chicken in the brine and refrigerate for 45 minutes. 
  2. Heat oil in a saute pan and cook the chicken until it's done. Set to the side to cool. 
  3. In soup pot, melt butter over medium heat. Saute the onion, carrot, and celery until starts to soften.
  4. Add flour and stir. Cook for  couple of minutes. Add chicken stock and bring to a boil. Reduce to low and broth should start thickening. 
  5. Cut biscuits into small pieces (they puff up a lot when cooking). Add to broth and allow to cook for 5 minutes. 
  6. Dice chicken into bite size pieces and add to pot. Add milk and season to taste. 

Saturday, August 13, 2011

Mac N Cheese Soup

Mac n cheese soup might be my ultimate comfort food. I came up with this recipe while experimenting with cheese soups (Guinness and Irish cheddar, yum! but I digress) last year and it is always a hit with kids and adults alike. Plus it does't pack as many calories and fat as it's lighter in cheese and pasta than the regular mac n cheese, and I sneak in some pureed vegetables too.


Ingredients:
  • 2 tablespoons butter
  • 4 cups mirapoix
  • 1/4 cup flour
  • salt
  • 4 cups chicken stock
  • 2 cups low fat milk
  • 8 oz shredded sharp cheddar cheese (or whatever kind of cheese you want)
  • 1/2 lb elbow macaroni, cooked
  1. In soup pot, melt butter and sautee mirepoix until tender. 
  2. Stir in flour and cook, stirring frequently, for 5 minutes over medium heat.
  3. Add in chicken stock and (increase heat) bring to a low simmer. Soup should begin to thicken. Keep at a low simmer, uncovered, for 10 minutes. 
  4. Remove from heat and add in milk and cheese. Puree with immersion blender. Season to taste.
  5. Stir in macaroni and serve.

Saturday, July 23, 2011

Most Amazing Zucchini Bread Ever

What do you do with zucchinis that are larger than your entire arm? Make the most amazing zucchini bread ever! That's what I did at least when my husband brought home giant zucchinis from a friend's garden. Lemon and rosemary is what makes this zucchini bread so special. The flavors are perfectly subtle so as to make you want more of it.

Ingredients:

  • 1 cup unbleached all-purpose flour
  • 1 teaspoon salt
  • 1 teaspoon baking soda
  • 1 cup sugar
  • 1 tablespoon chopped fresh rosemary
  • 2 eggs, beaten
  • 1/2 cup canola or other bland vegetable oil
  • 2 packed cups of shredded zucchini with excess water strained off
  • 1 tablespoon lemon zest
  • 1/4 cup lemon juice
  1. Preheat oven to 350F.
  2. In large bowl mix all dry ingredients (flour, salt, baking soda, sugar, and rosemary).
  3. In another bowl, add all wet ingredients (egg, oil, zucchini, lemon juice, and lemon zest).
  4. Add the wet ingredients to the dry ingredients and combine well, but do not over mix.
  5. Grease loaf pan with non-stick cooking spray and pour batter into it. Cook for 45 minutes or until knife test shows it is completely cooked.