Saturday, April 7, 2012

Your Basic Deviled Egg


Deviled eggs is the food I look forward to the most at Easter time. This year my husband and I decided to stay home rather than visiting the family, but I won't go without the deviled eggs. The great thing is that you can make as many or as few as you like. If your making them for a large group you may want to make a couple dozen, but if you're making them just for yourself (as I'm doing this year) then you can make just a couple.

This is a super-basic deviled egg because it's the only kind I like. I hate when sweet relish is added or any other "creative ingredients" for that matter. But when you have such a basic recipe it has to be spot on. These actually earned me an A on a final in culinary school last year. First, you want to make sure you don't use really fresh eggs. As an egg ages, it starts to pull away from that membrane between the egg and shell, making it easier to peel once the egg is cooked. Second, you want to make sure you cook the eggs properly. Nobody likes rubbery egg whites or green yolks from overcooking.

How to make a proper hard-boiled egg.

  1. Bring eggs to room temperature by leaving them out for about an hour. 
  2. Place eggs in a pot and over them with tap water. 
  3. Place over high heat and bring to a boil. 
  4. Let boil for just 1 minute (no longer) and then turn off the heat. 
  5. Set a timer for 12 minutes. 
  6. At the end of 12 minutes, remove the eggs from the hot water and place in a cold water bath to stop the cooking process.
Your egg should look like this. The whites will be soft and the yolks yellow. 


How to make deviled eggs.
Ingredients:
  • 6 hard boiled eggs
  • 1/4 cup mayo
  • 1 tablespoon Dijon mustard
  • pinch of salt
  • pinch of cayenne pepper
  • paprika, for garnish
  1. Peel eggs and cut in half length-wise. Remove the yolks and place them in a bowl. Set the whites aside. 
  2. To yolks, add mayo, Dijon, salt, and cayenne pepper. Add more salt to taste. 
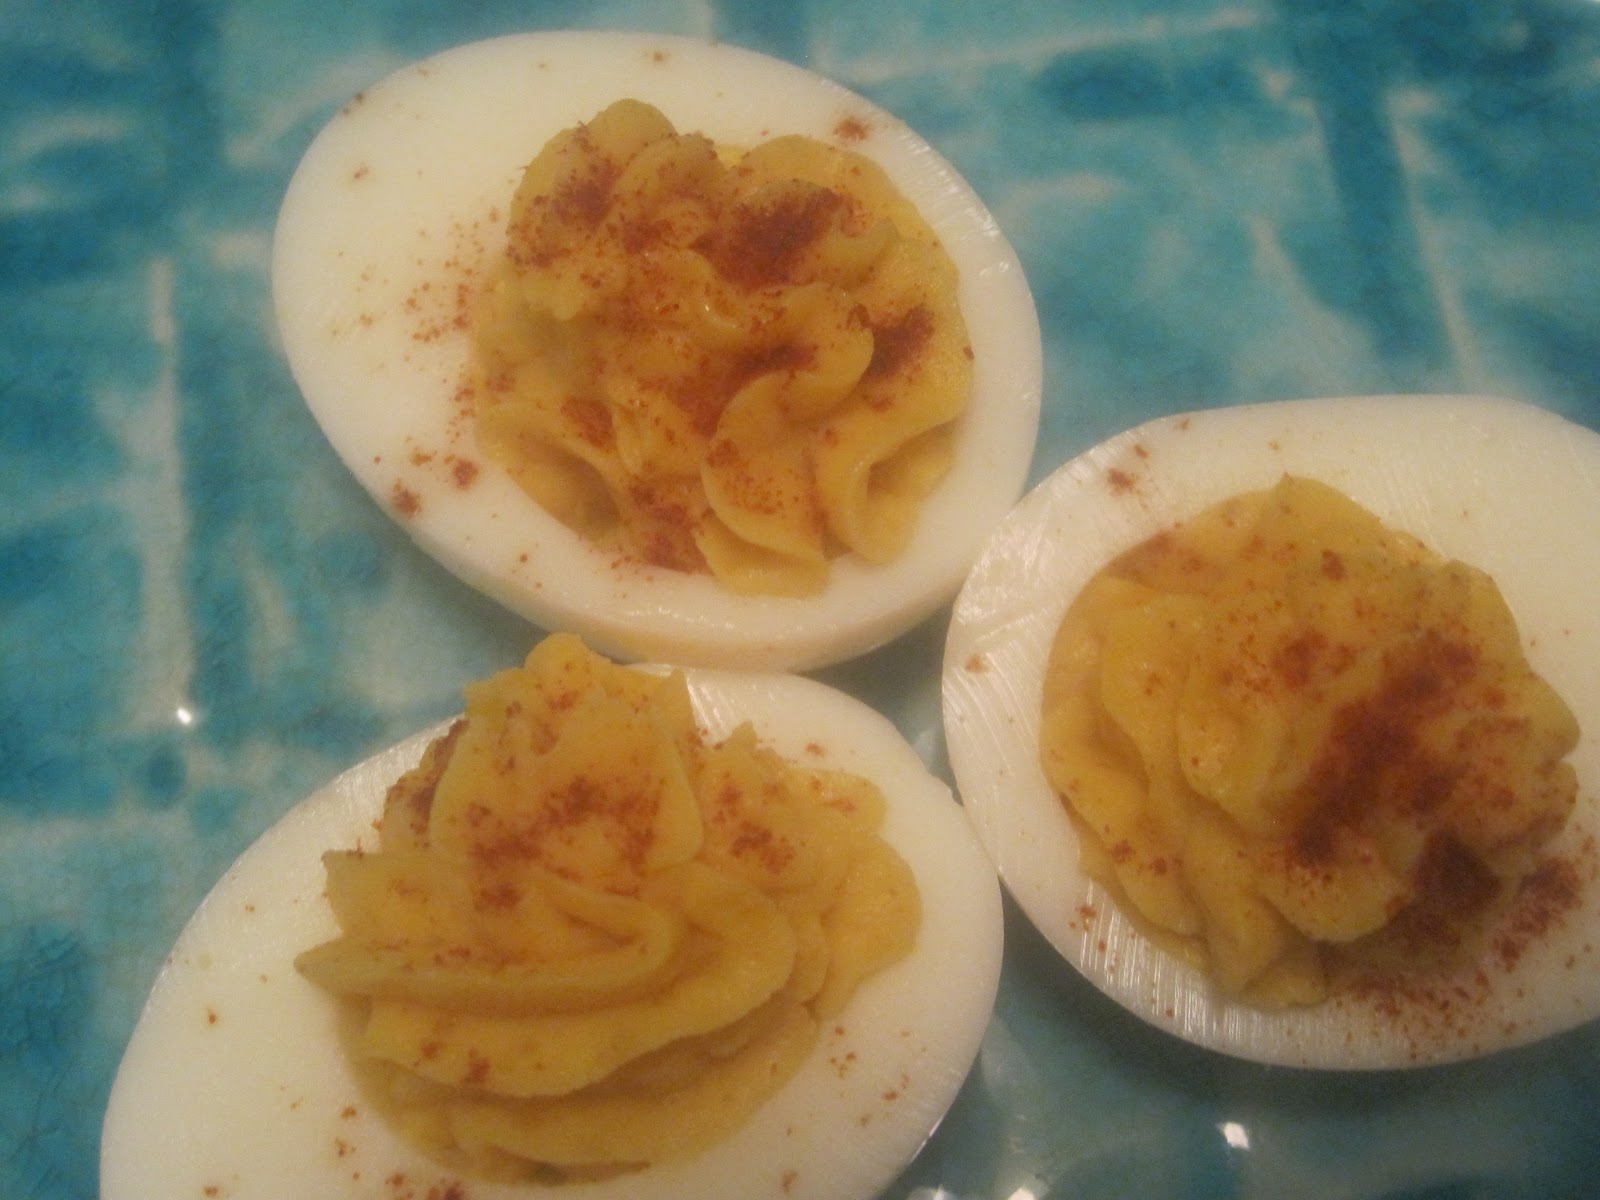
  3. Put the yolk mixture into a piping bag with tip. If you don't have a piping bag, just use a zip lock bag with a corner cut off. Pipe the mixture in the egg whites. 
  4. Sprinkle lightly with paprika. Refrigerate and serve once fully chilled. 

Wednesday, April 4, 2012

Mmmm... Meatballs and Spaghetti

Italians eat spaghetti. Italians eat meatballs. Italian do not, however, eat spaghetti and meatballs. That is an American invention and a splendid one at that.


My husband, Jimmy, and I had lunch at an Italian restaurant one day where Jimmy ordered their famous giant meatball (yes, just one as this thing was the size of a softball) with spaghetti. His meatball was bland and crumbly. I promised him that I would make him the best meatball he's ever had. And I did. Combining ground beef, pork, and pancetta, packs a huge punch of flavor. My meatballs are rich, moist, and far from bland. This recipe makes a lot of meatballs and is great for entertaining a large crowd. I love making meatball subs with the leftovers too!

Meatballs Ingredients:
  • 1 1/2 cups Panko bread crumbs
  • 1 cup milk
  • 2 eggs
  • 1 lb lean ground beef
  • 1 lb lean ground pork
  • 6 oz pancetta, finely chopped
  • 2 cloves garlic, smashed into a paste
  • 1 cup grated Parmesan cheese
  • 1/4 cup minced fresh Italian parsley
  • 1 teaspoon powdered gelatin, dissolved in 2 tablespoons cold water
  • 1 teaspoon salt
  • 1/2 teaspoon pepper
Sauce Ingredients:
  • 2 tablespoons olive oil
  • 1 onion, finely chopped
  • 4 cloves garlic, minced
  • 1/2 teaspoon red pepper flakes
  • 1 teaspoon dried oregano
  • 2 cups red wine
  • 2-28 oz cans San Marzano tomatoes, with juice
  • 1-6 oz can tomato paste
  • salt and pepper, to taste
  • sugar, to taste
  • grated Parmesan, for serving
  • 2 lbs spaghetti
  1. Start by making meatballs. Preheat oven to 400F and spray 2 baking sheets with non-stick spray or olive oil. 
  2. In a large bowl, mix together the Panko and milk, letting it sit for a few minutes and mash with a fork against the side of the bowl. Then add all the rest of the ingredients and fold everything together. 
  3. Roll into meatballs about the size of a golf ball and place on the baking sheets. This will give you about 30-40 balls. Place in oven and set timer for 25 minutes. When meatballs are done, remove from the oven and reduce heat to 300F. 
  4. While meatballs are cooking, start on the sauce. In (very) large pot, heat olive oil over medium heat and saute the onions  with a couple pinches of salt until translucent. Add the garlic, red pepper flakes, and oregano, and cook for 2-3 minutes more.
  5. Pour in the wine, tomatoes, and tomato paste, and bring to a boil. Reduce to a simmer and cook for 10 minutes. Use an immersion blender to puree the sauce. Simmer for another 10 minutes. 
  6. Adjust taste using salt, pepper and sugar. Use a teaspoon of sugar at a time- this will deepen the flavor, but don't use too much. You can also add more oregano right now if you'd like. 
  7. Place the meatballs into the sauce and try to get them mostly covered with sauce. Cover pot with foil and place in the oven for 1 hour. 
  8. In separate pot, cook the spaghetti according to the package directions minus 1 minute. Drain the spaghetti and return to the pot. Stir in a little sauce from the meatballs. 
  9. To serve, place spaghetti on a plate and then top with 2-3 meatballs plus more sauce and a sprinkle of Parmesan. 

Monday, January 30, 2012

Bucatini Alla Matriciana


Bucatini alla Matriciana is one of the most famous Roman dishes (right next to Spaghetti alla Carbonara and Bruschetta) and yet you have, more than likely, never heard of it. Probably because at the center its flavor profile is guanciale which is cured pork jowl or cheek. If that scares you or if you just can't find it where you live, then you can substitute pancietta or bacon and still have a delicious meal, but you'd be missing out on some serious authentic Italian flavor. There are tomatoes in the sauce, but the tomato is far from the star; the rich guanciale and Pecorino Romano take center stage here. If you want to take a bite out of Italy the key is using Italian ingredients. It gets a bit pricey for the real deal, but well worth it and lot cheaper than a plane ticket to Rome. 

Ingredients:
  • 1/2 lb guanciale, cut into cubes/lardons
  • 2 small/medium yellow onions, diced
  • 3 cloves garlic, minced
  • 1/2-1 teaspoon crushed red pepper flakes, depending on your preference
  • salt to taste
  • 1 28 oz can San Marzano Tomatoes, diced, plus the juice
  • 1 lb bucatini pasta, cooked 1 minute less than directed on package (buy the best quality pasta you can find)
  • 1 cup grated Pecorino Romano plus more for garnish
  • Olive oil
  1. Cook the guanciale over medium-low heat in large skillet until fat is rendered out. Remove most of fat, leaving ¼ cup in pan.
  2. Add onion, couple pinches of salt, and red pepper flakes. Cook until onions become translucent. Add in garlic and cook for a couple minutes more.
  3. Add tomatoes and bring sauce to a boil. Reduce to low simmer and cook for 1 hour. The sauce should reduce into a thick paste.
  4. Toss the pasta into the sauce. Add cheese and drizzle of olive oil to help the cheese bind to the sauce. Toss until sauce is evenly distributed.
  5. Serve topped with more cheese. 

Monday, January 23, 2012

The Croque Monster


I am a San Francisco girl, born and raised in the east bay, and my heart is broken over the 49ers loss yesterday. What better way to deal with disappointment than with bacon? I'm making a croque monsieur for dinner tonight, which is basically a fancy, French named for grilled ham and cheese sandwich. I had to make these in culinary school where I started calling it a "croque monster" and the name just stuck.

There are countless varieties of a croque monsieur. Aside from using Canadian bacon instead of ham, I'm going pretty traditional. I've got white bread with crusts removed, a Swiss cheese (Gruyere), and bechamel sauce. It sounds simple, and it is, but it's so delicious. It's crunchy on the outside and ooey-gooey cheesy on the inside. 

Ingredients (makes 4 sandwiches):
  • 8 slices white bread, crusts removed, toasted, and lightly buttered on both sides
  • 16 small slices/8 oz Swiss cheese (Gruyere or Emmental)
  • 8 oz sliced ham (or Canadian bacon)
  • 1 tablespoon butter 
  • 1 1/2 tablespoons AP flour
  • 1 cup hot milk
  • 1/2 teaspoon salt
  • pinch of nutmeg
  1. Preheat oven to 400.
  2. First make bechamel sauce. Place butter in sauce pan and melt over low heat. Once, melted, add flour and stir for 2-3 minutes. Slowly whisk in milk. Increase heat to medium, stirring continuously until thickened. Season with salt and nutmeg. Remove from heat and cover with plastic film to prevent film from forming until ready for use. 
  3. Place a slice of cheese on each piece of buttered toast and put it in the oven until the cheese is meted.
  4. Warm the ham either in a skillet or grill top - or a microwave will do too. 
  5. Assemble the sandwich, placing 1 oz of ham on one slice of bread and a smear of bechamel sauce on the other. Gently push the 2 pieces of bread together and slice diagonally. Variation: Instead of putting the bechamel sauce in the sandwich, you can pour it over the top, making it a knife and fork sandwich. 


Thursday, January 12, 2012

Speedy Butter Chicken


still remember the first time I ever tried Indian food. I was backpacking in Europe after graduating high school and we went to Wales for a weekend to visit a friend. They eat a lot of Indian food in the UK and my friend ordered some take out from a local restaurant. I don’t remember what we ate, but I remember the flavors were like nothing else I’d ever eaten before. It was spicy, rich, and so flavorful. I was immediately hooked.

Chicken tikka masala is probably the most popular Indian dish despite the fact that it technically isn’t from India. Chicken tikka masala was invented in England, and although the origins are disputed, it is most likely spin off of Murgh Makhani, or butter chicken, which is an Indian dish. Butter chicken was invented by Kundan Lal Gujral who owned a restaurant in Peshawar named Moti Mahal. While trying out new recipes, Gujral tried cooking chicken in tandoors, which were ovens used by locals to cook bread. And so Gujral had invented tandoori chicken. Punjab was partitioned in 1947 and Gujral fled to India with thousands of other Hindu refugees. He re-opened Moti Mahal in Daryagani, Delhi, and the popularity of tandoori chicken soon spread. The leftover tandoori chicken didn’t keep too well as it would dry out quickly. So in order to keep the chicken moist, one of the chefs at Moti Mahal invented a tomato-based gravy, and so was born butter chicken.

Kundan Lal Gujral’s grandson, Monish Gujral, published a Moti Mahal cookbook where he gives the original recipe for butter chicken. Simply do an Internet search for “Moti Mahal’s Murgh Makhani” and it will be easy to find. It's quite involved though so I've created this quick version that might be just as delicious. 

Ingredients:

  • 1 rotisserie chicken, white and dark meat cut into bite-size chunks
  • 4 tablespoons butter
  • 1 onion, finely diced
  • 2 cloves garlic, minced
  • 1 tablespoon Garam Masala
  • 1 teaspoon fenugreek powder
  • 1 teaspoon cumin
  • 1 teaspoon chili powder (optional)
  • 2 heaping tablespoons tomato paste
  • 1 cup cream
  • 1/2 cup roasted cashew pieces
  • salt, to taste
  • Serve with basmati rice and naan.
  1. In large skillet, melt butter completely over medium heat. Add onion and cook until soft.
  2. Reduce heat to medium-low. Add garlic and spices, and allow to cook for a couple minutes in the butter. 
  3. Stir in tomato paste and cook for another minute. Add cream and cashews, and salt to taste. Toss chicken in the sauce and allow to simmer for 3 minutes over low heat before serving. 

Sunday, January 8, 2012

What Vegetables? Tortilla Soup


A coworker brought this delicious tortilla soup to a potluck and I fell in love with it. I hate cauliflower and was so impressed that I was devouring it, "What do you mean there is vegetables in this?" This is basically nothing but pureed vegetables with a Mexican flare and thickened with tortillas. I have slightly adapted it and you should feel free to change it up to suite your own tastes or to use up any vegetables you have on hand. The soup is wonderfully savory and has a little kick of spice to it too. The garnishes really make the dish and it's fun to see your diners make their bowl of soup their own. I like mine with shredded cheddar, avocado, and few dashes of hot sauce.

Ingredients:
  • 1 tablespoon vegetable oil
  • 2 leeks, white and light green parts only, chopped. You can substitute an onion if leeks aren't available.
  • 3 carrots, peeled and chopped
  • 3 stalks celery, chopped
  • 5 cloves garlic, smashed and peeled but left whole
  • 5 mild chili peppers (Anaheim, Poblano, Pasilla), charred over flame or under broiler, then chopped
  • 6 cups chicken broth
  • water
  • 1 head cauliflower, chopped
  • 1 bunch cilantro, roughly chopped with large stems removed
  • tortillas - 2 medium flour or 4 small corn, toasted in oven and crushed into small pieces. You can also use a handful of tortilla chips instead if you have that on hand. 
  • salt to taste
  • milk (optional)
  • garnish ideas: shredded sharp cheddar cheese, chopped avocado, sour cream, tortilla strips, and/or hot sauce.
  1. Heat oil in soup pot over medium heat. Add leeks, carrots, celery, and garlic, and saute until fragrant and start to soften. 
  2. Add in peppers and saute another 5 minutes. 
  3. Pour chicken broth over vegetables and increase heat to high until it boils. Decrease heat to medium simmer ad add cauliflower. Add water if needed to cover the cauliflower completely. Simmer for 10-15 minutes, until cauliflower can be easily pierced with a fork. 
  4. Add cilantro and tortillas. Using immersion blender, puree until smooth.
  5. Season with salt. If soup is too spicy you can add a cup or 2 of milk to decrease the heat.
  6. Serve with garnishes. 

Saturday, January 7, 2012

Salted Caramel Ice Cream


I'm not really into sweets, but when it's ice cream I have little self control. I can and will eat a pint of ice cream in one sitting. So you can imagine my delight (and my fear) when I received an ice cream maker for Christmas. I had been holding onto a special ice cream recipe as I knew the day would eventually come when I could use it: salted caramel ice cream from non other than Rori herself.

Rori's Artisanal Creamy is located in my hometown of Santa Barbara. Their ingredients are organic, local, and super fresh, sourcing their dairy from Marin county, fruit from the farmer's market, and fair-trade chocolate from San Louis Obispo. Their commitment to quality is evidence when you taste their ice cream. I was watching the Barefoot Contessa on Food Network one Saturday morning when Rori made a guest appearance and shared her recipe for her salted caramel ice cream. This stuff is perfectly sweet and salty, and deliciously creamy.

You can also use this ice cream base recipe and add in all kinds of flavors. I made a sinfully rich dark chocolate ice cream by melting 7 oz of high quality dark chocolate and blending in 3/4 cup of heavy cream. Then I added that to the ice cream base with 1 tablespoon of vanilla. Delish!

Ice Cream Base:

  • 1 cup whole milk
  • 4 large egg yolks
  • 3/4 cup sugar
  • 2 cups heavy cream
  1. Heat the milk in a sauce pan over medium-low heat.
  2. Prepare an ice bath by setting a 2 quart bowl over a larger bowl partially filled with ice water. Set a strainer over the smaller bowl and set aside.
  3. In a separate bowl, whisk together the egg yolks and sugar until pale yellow in a color and the sugar has dissolved. Gradually pour in the warmed milk into the yolk mixture, whisking constantly. Pour the mixture back into the same saucepan you used to warm the milk. Cook for 3-5 minutes, stirring constantly, until the custard thickens and coats the back of a wooden spoon.
  4. Strain the custard into the top bowl of the ice bath to stop the cooking process. Add the heavy cream and stir over the ice bath until cool. Cover the bowl with plastic wrap and chill thoroughly.
Caramel Sauce:
  • 1 1/4 cups sugar
  • 3/4 cup heavy cream
  • 2 teaspoons flaky sea salt, such as Maldon
  • 1 tablespoon pure Tahitian vanilla extract
  1. Heat the sugar in a dry heavy-bottom sauce pan over medium heat, stirring with a fork to heat the sugar evenly, until it starts to melt. Then stop stirring and swirl the pan so the sugar melts evenly, and continue cooking until it is a dark amber color. 
  2. Carefully add the heavy cream (the mixture will splatter) and cook, stirring until all the caramel has dissolved. Transfer to a heat-proof bowl and stir in the sea salt. (Personal note: I use 1 1/2 teaspoons salt as I like it more salty)
  3. Set the caramel mixture over a bowl filled with ice water and stir until chilled to room temperature. Combine the caramel mixture with the ice cream base and add the vanilla. 
Lastly, place the finished ice cream batter into an ice cream maker and finish using manufacturer's directions.